Darn! In a brand new skein of yarn, you run into an ugly knot that you don’t quite know what to do with. In this blog post, I’m going to help you understand why these knots occur and what you can do about them.
Where do the knots come from?
Even though knots in the middle of a skein are super annoying, unfortunately, you can’t avoid them. When the yarn is made, it’s spun into a 1093 yards long strand that is wound up on large spools. The knot happens when a spool runs out and another one is attached. And on top of that, the strand might break, which can result in several knots in the same skein. The reason why they don’t just discard broken yarn and skeins with knots in them is to keep the price of the yarn down. Throwing out raw materials and the time it would take to find skeins with knots in them would increase the price of the products, since it would be the only way to pay for the extra expenses such efforts would require.
How many knots may a skein have?
Yeah, that’s the question, isn’t it? And not one that’s easy to answer, since I couldn’t really find any industry guidelines in my research. But what I did find is that it seems that the industry generally finds 3 knots per 50 grams (1.8 oz) acceptable.
What to do
It’s important that you don’t just ignore the knot. You can't be sure that the knot will hold in the wash, and it can leave a hole, which would be much worse than the knot itself - and much harder to repair.
Depending on the material you’re working with, I recommend one of these methods that will make the battle against knots a lot easier.
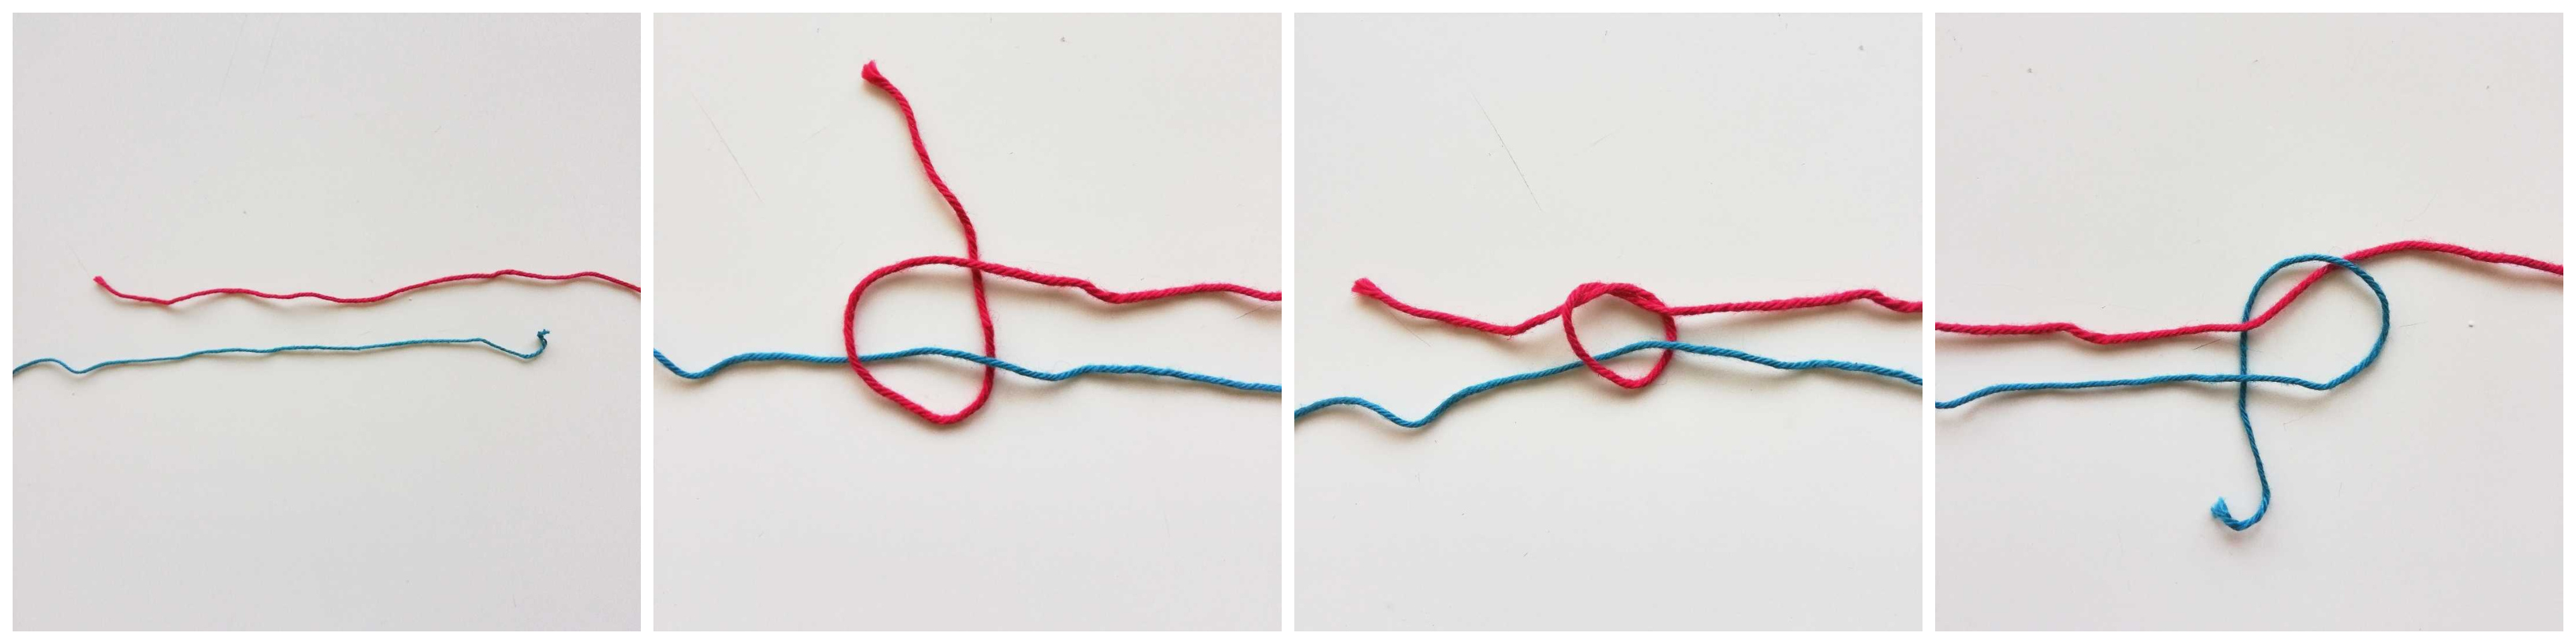
Magic knot
The magic knot definitely works best with cotton, since it has a tendency to untie itself in other materials when the project is used after it’s been washed. On the other hand, it’s very easy to do and is great for gathering leftover yarn into large skeins to make the most of your yarn ;)
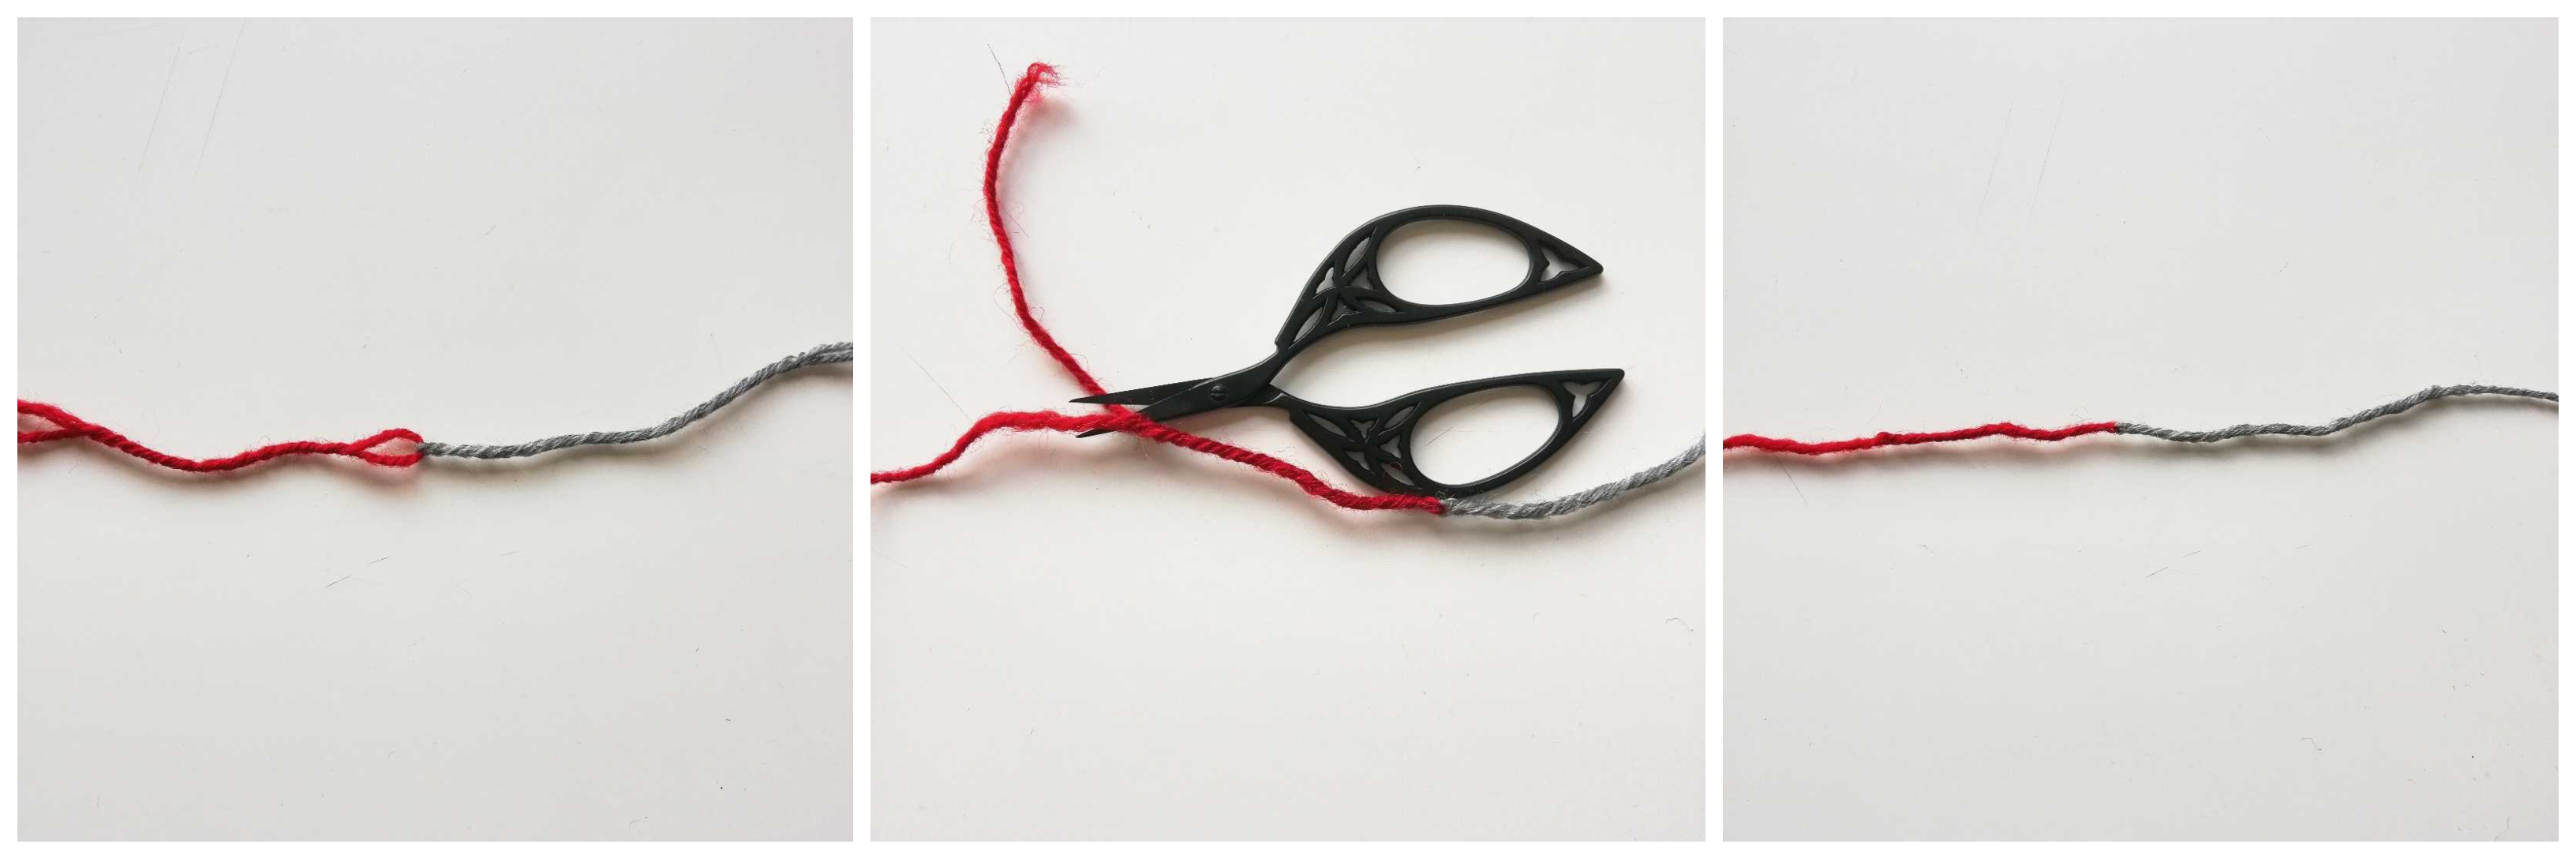
To make the magic knot, you need to place two ends of yarn next to each other facing opposite directions. Then you take one end and make a knot with it around the other strand. Repeat this step with strand number two and tighten the knots. Next, pull the knots together and tighten them as much as possible. To finish off, cut off the excess yarn.
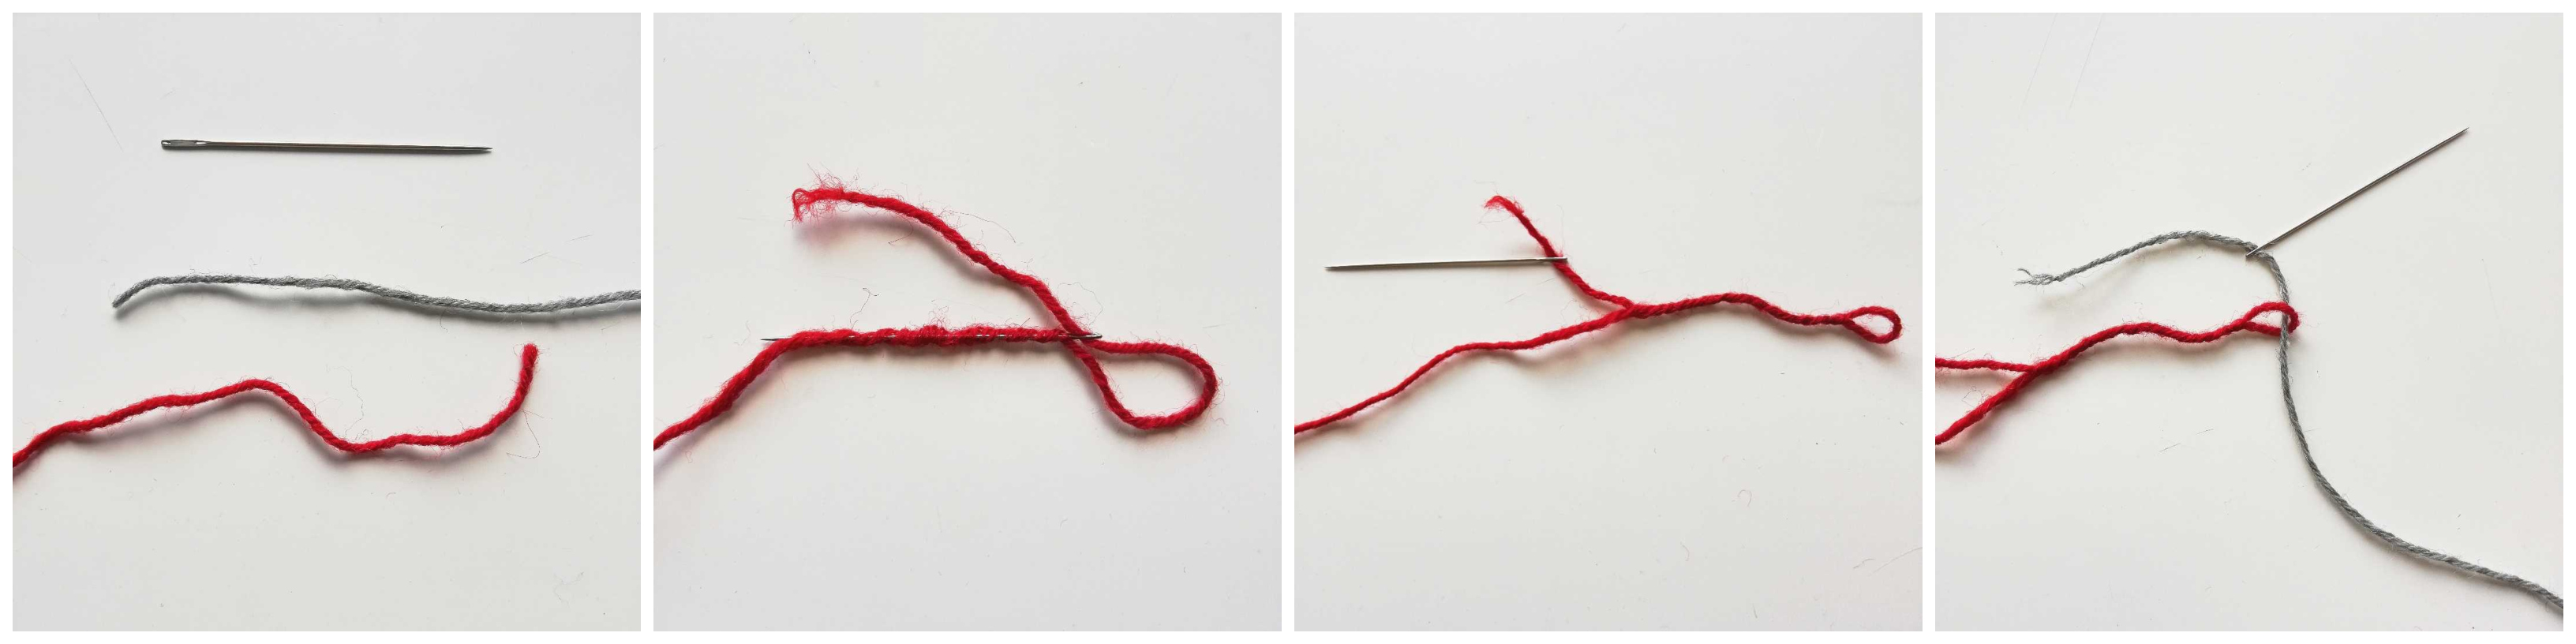
Russian join
Russian join can be used on most multi stranded yarns, primarily wool and acrylics. For this method, you’ll need a sharp tipped needle, but otherwise it’s pretty simple.
If you need a sharp tipped needle, I’m a fan of these ones from Clover, that come with a case, so you won’t lose them.
Thread the needle with one end and work the needle through the middle of the same strand of yarn, almost like you’re sewing through the yarn. Make sure to “sew” through 5-7 cm (2-3”) of yarn so that the join won’t untangle itself - remember to leave a loop at the end. Now, thread the needle with the other yarn-end and pull the yarn through the loop of the first yarn, and repeat what you did with the first end - but without leaving a loop. When it’s done, tighten the loop on the first yarn-end and trim the excess.
Spit splice
The spit splice can only be done with yarns made from 100% wool and works best with untreated yarn. The method can, however, be done with superwash treated wool - you just need a little extra elbow grease ;) However, you get a join that’s completely knot-free, which makes the transition between the two strands almost invisible, albeit a little thicker.
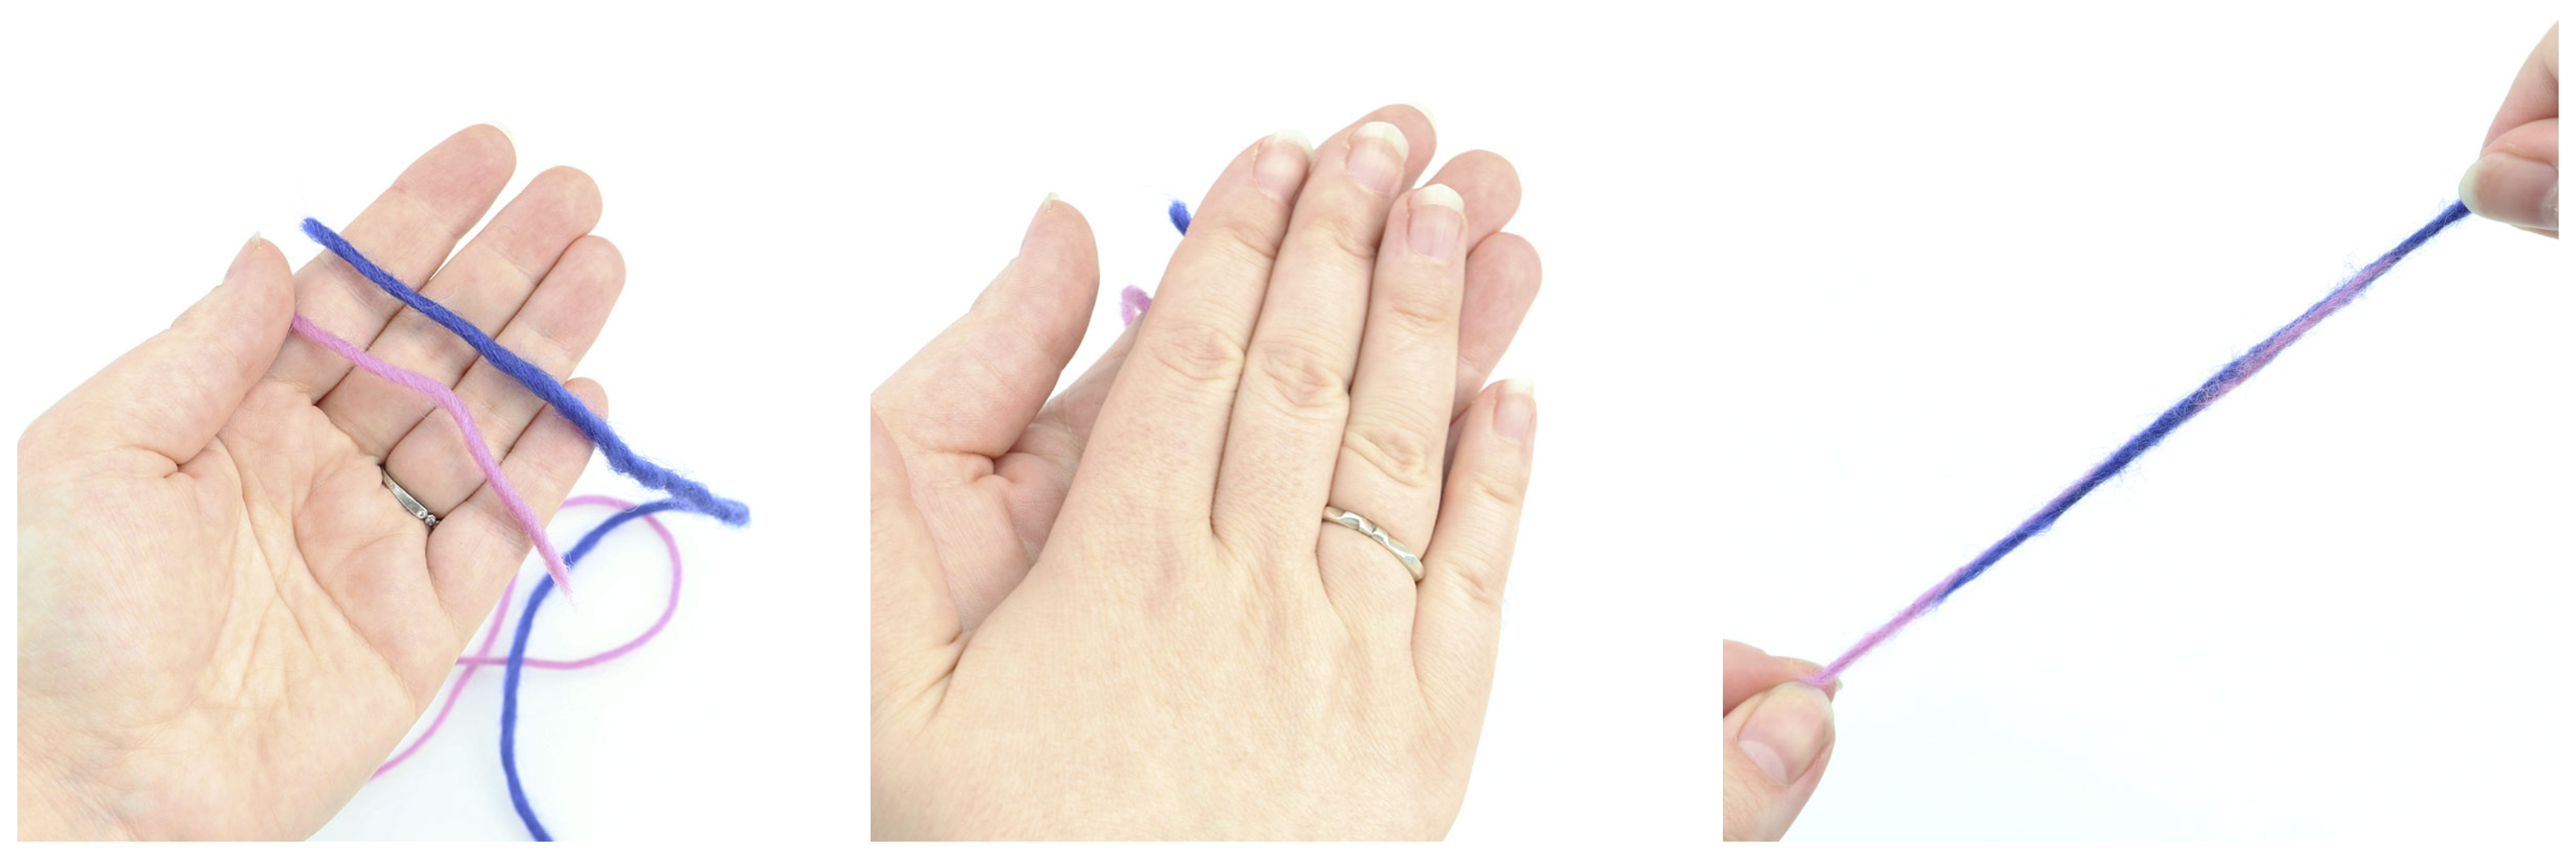
The yarn is spliced by putting the two strands in one palm with the two ends facing opposite directions. Then the palm is moistened (this can either be done with spit - hence the name - or water), after which the two strands are rubbed together by rubbing your palms together back and forth. Continue doing this until the splice is completely smooth.
As mentioned, this method also works with superwash treated yarn (100% wool). You just need to make sure that you untangle the ends a little, so that the yarn has something to hold on to, when you rub your hands against each other.
Staggered splice
The staggered splice is perfect for multi stranded yarn and doesn’t make a knot or require you to weave in ends. The method is especially well-suited for thicker yarns, where a knot would become too visible.
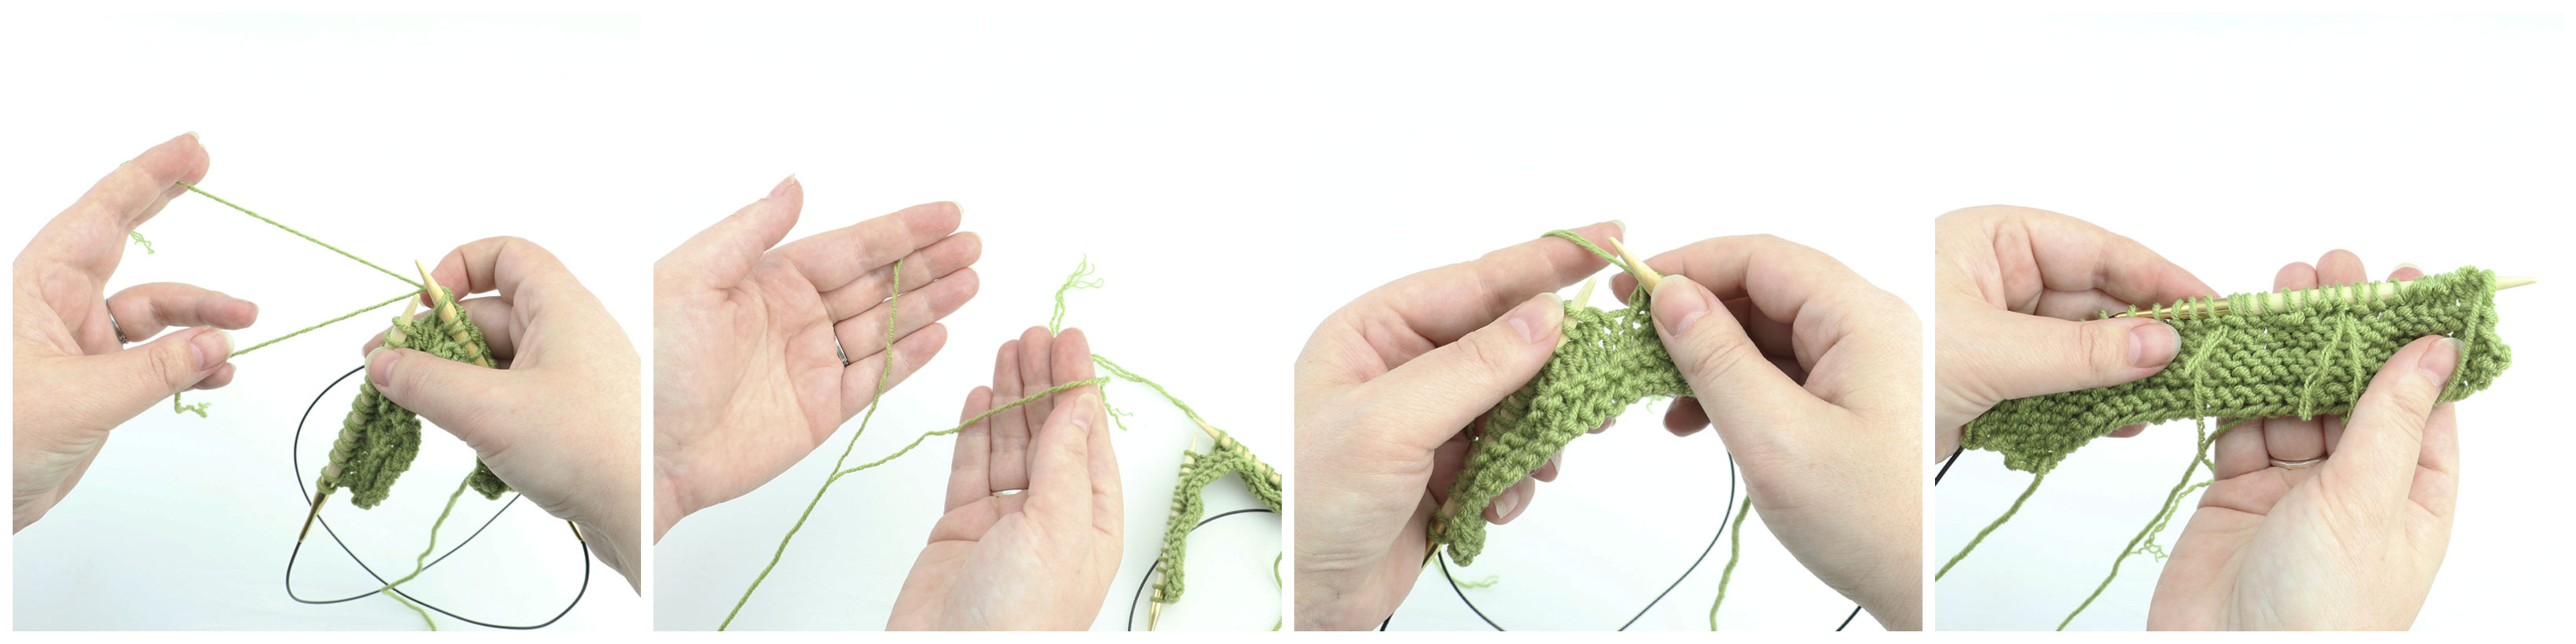
The method is pretty simple. The threads in the two ends are split so that the number of threads is the same as in the original strand, when they’re knit together. Meaning: If there are 6 threads in the yarn then the two ends must be split into two, each containing 3 threads, so that they can be gathered into a new strand of 6 threads. In case of 5 threads, then split the strands into one with 2 threads and one with 3, so that they can be gathered into a new strand with 5 threads when joined.
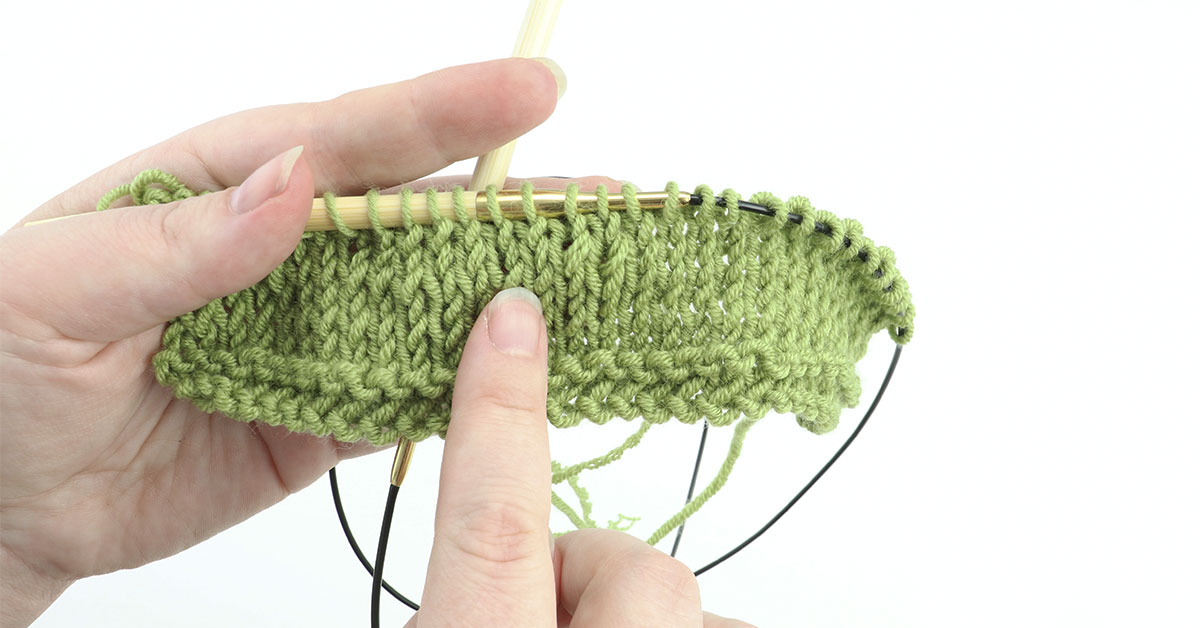
Now you need to knit the ends together. Let the ends overlap for a good while so that they, together, create a strand with 6 threads in it, and knit as you normally would. It’s important that you knit at least 6 stitches like this, to make sure that the splice will hold. From here, keep knitting with the new skein. The ends are trimmed on the wrong side leaving a couple of centimeters/inches so that they won’t pop out on the right side. The ends should not be joined but will probably need to be tightened once in a while to make sure that the stitches don’t loosen.
I just bought Hobbii's Bamboo Deluxe circular needle set, and I love it! It’s just so great to knit with, that you can’t put it back down again.
And this method actually works for crocheting as well. You just need to remember that crochet stitches use more yarn than knit stitches, but, on the other hand, it doesn’t take as many stitches to make a safe join.
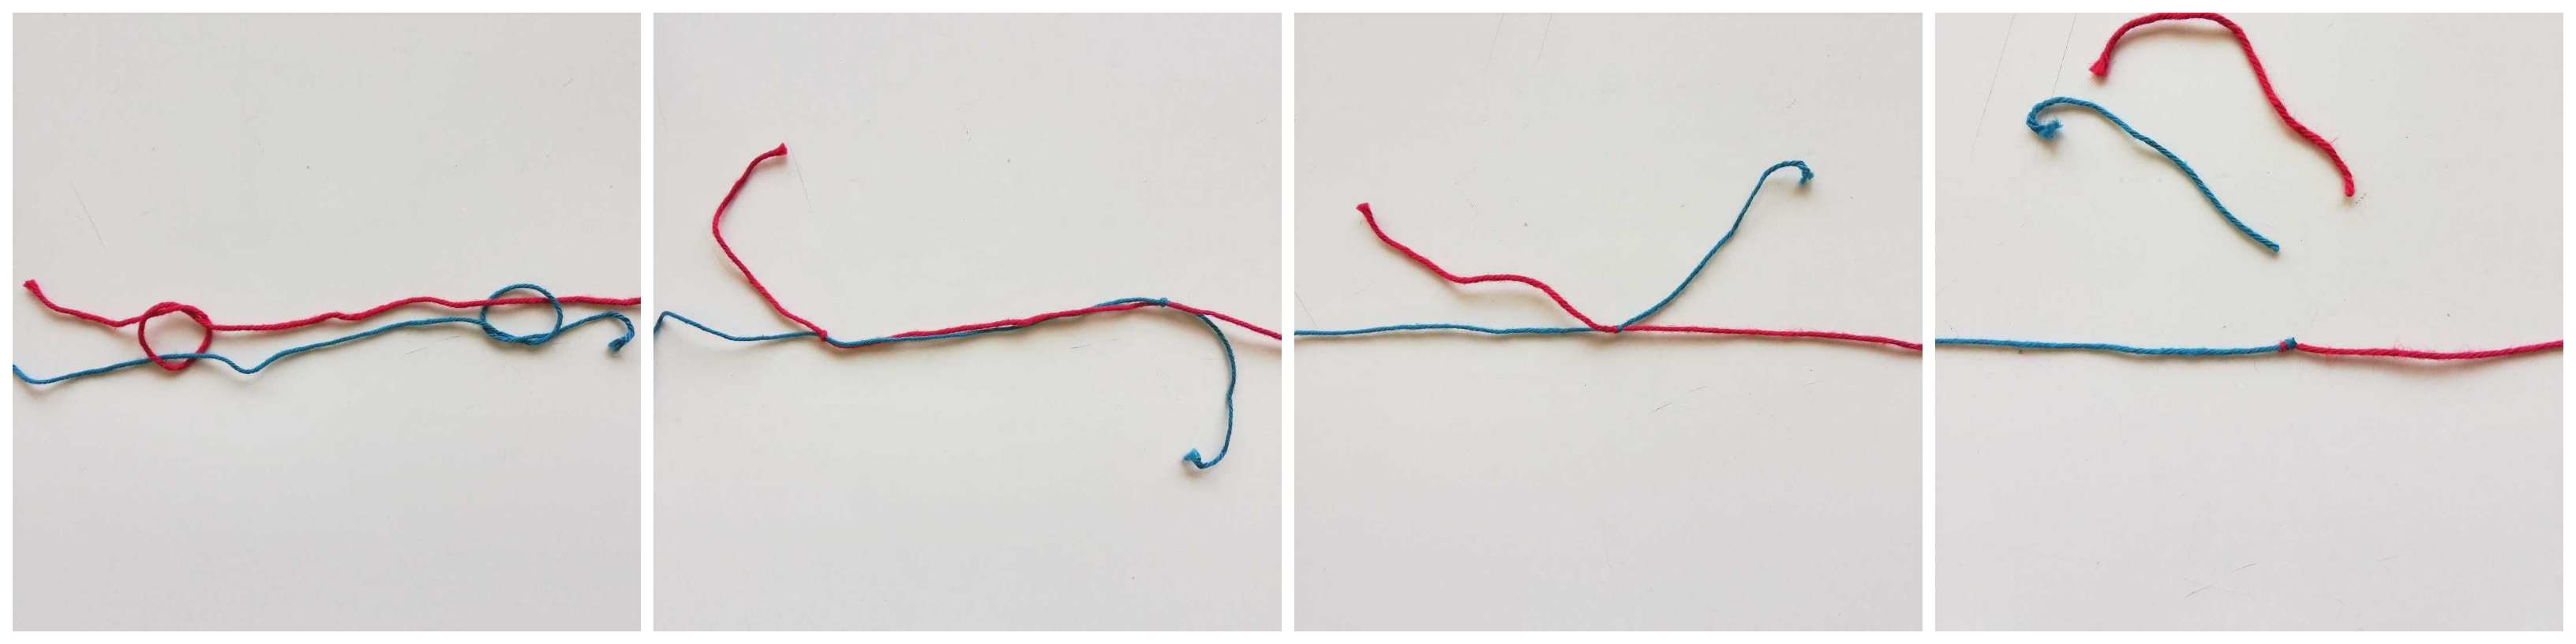
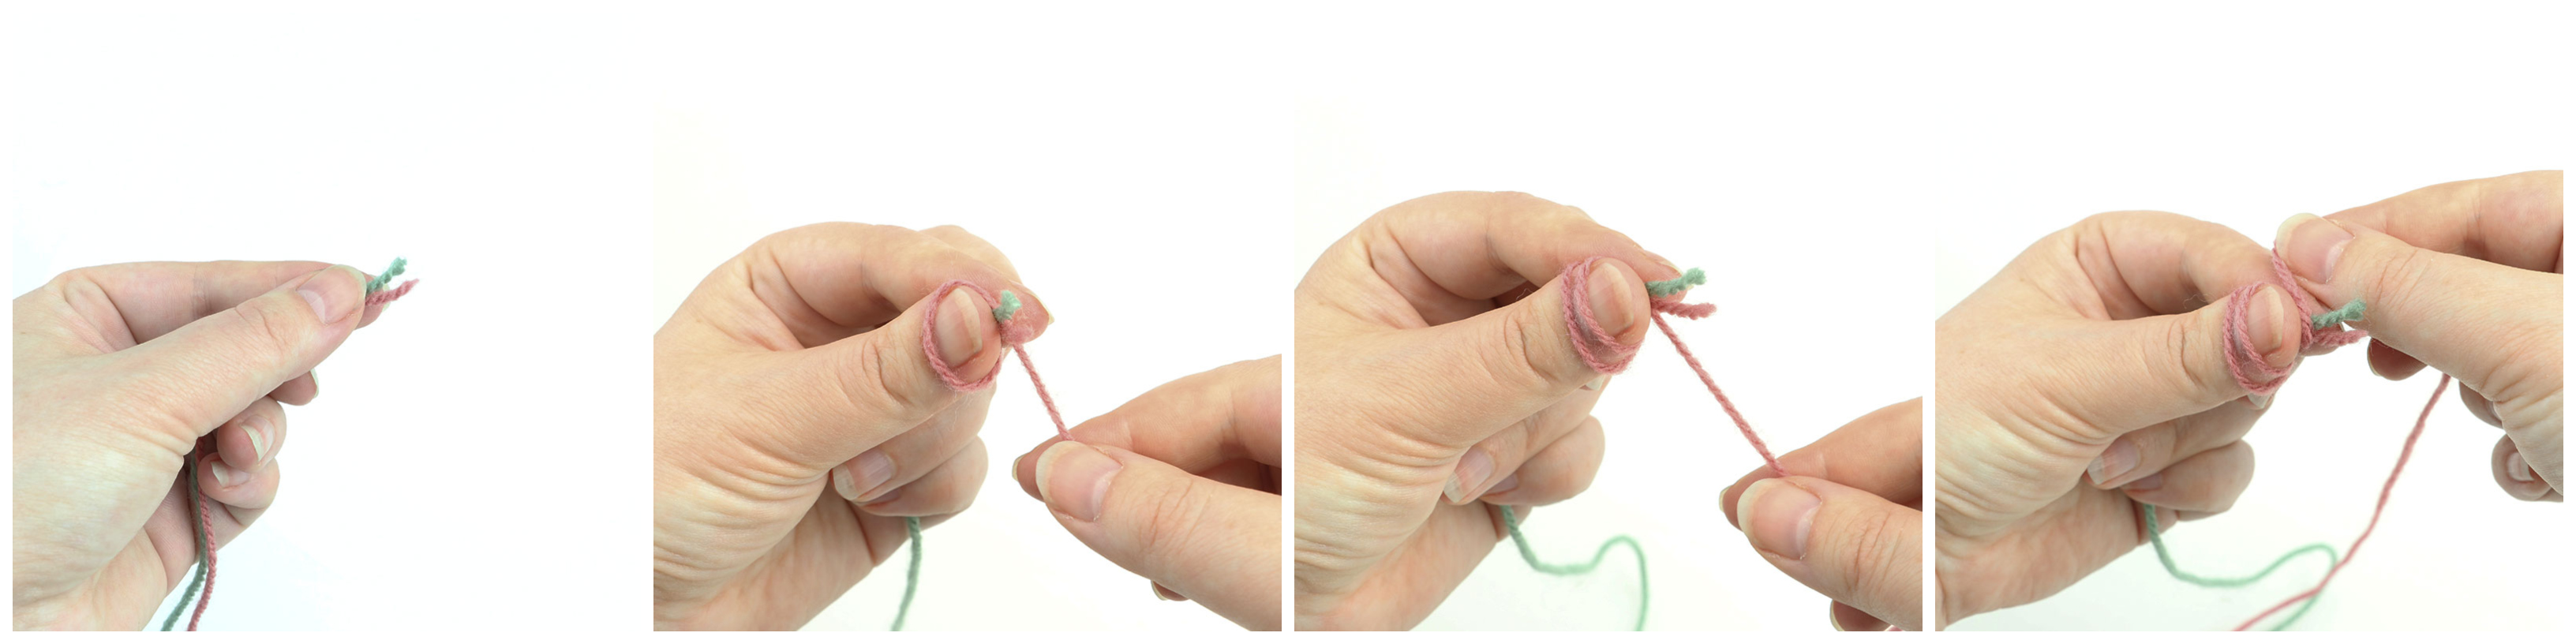
Magic – no ends – knot
I was shown this method by my good friend, and this is the method I use when I need to join two acrylic yarns, since it just holds up perfectly! On the other hand, it’s probably not the most beginner-friendly knot, but when you’ve got the hang of it, it’s really effective.
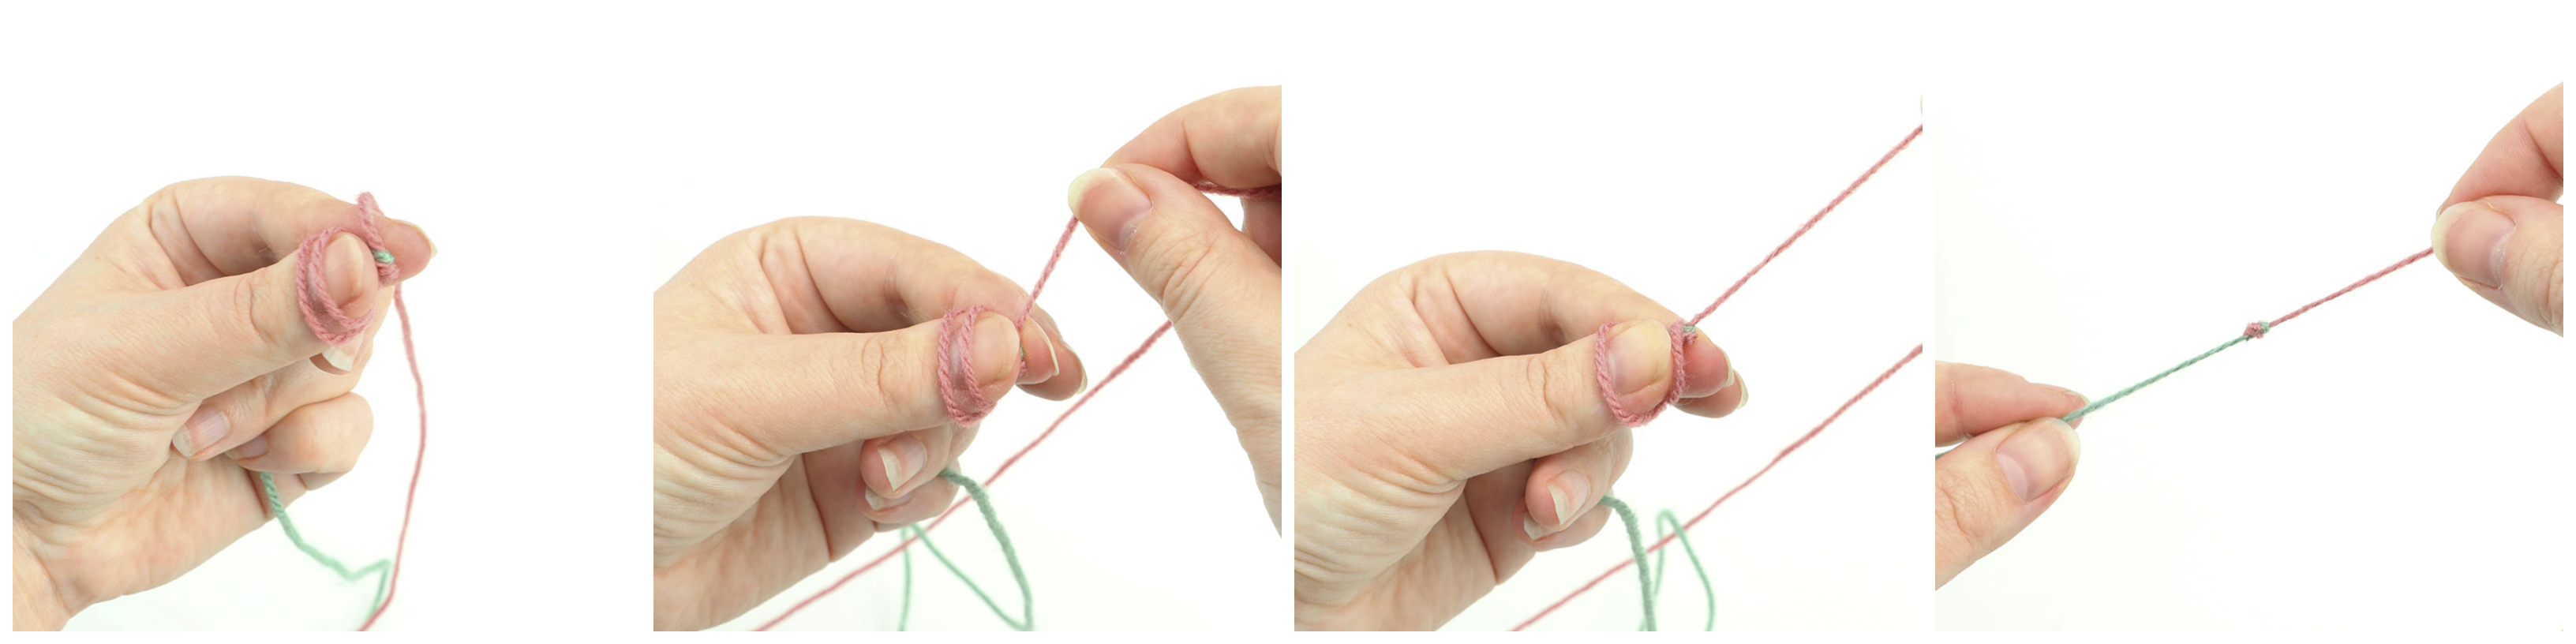
Place the two ends side by side so that they’re facing the same direction while holding the ends between your thumb and forefinger. You should be able to see a small centimeter (around 0.3”) in front of your fingertips. Now, take the right strand (if you’re right handed, that is) and work the yarn around your thumb and the yarn between your two fingers - repeat once.
It’s important that the strands are not crossed. Now take the yarn and work it between your thumb and the yarn ends, after which the yarn ends are bent over the yarn and hidden under the thumb. Now, gently pull the strand you’ve wrapped around your thumb and watch how the whole thing is tied together into a perfect knot.
I hope this little guide on knots and what to do with them will help you make the best of the knotty skeins you may encounter in your yarn-work. Please tell us which method you prefer when you encounter a knot.
Love,
Eva from Hobbii

