The magic ring is a fundamental crochet technique that will take your crochet projects to the next level. The technique can be a little tricky to master at first, but don’t worry - we will guide you through three different magic ring techniques.
Video tip! Click on “Settings” (the small gear under the video ⚙) to change the language of the subtexts. You can also adjust the speed of the video if you need to rewatch the technique at a slower pace.
In the video above, we will show you how to make a magic ring in just a few steps.
The magic ring can be a little tricky to master at first. But if you stay calm and keep practicing, I am sure you will master this cool technique. You may even find out that this technique is much easier than you expected.
Here, we have found 3 different magic ring techniques for you. Try them all out and find the one that works best for you.
What is a magic ring?
A magic ring is an essential and indispensable crochet technique for crochet projects where you work in the round.
Why you should master the magic ring
The magic ring is a must-know technique if you want to crochet other things than blankets and dishcloths. If you want to crochet amigurumi and bags, you will need to master the magic ring.
With a magic ring, you won’t end up with a hole in the bottom of your project when you work in the round. The magic ring actually lets you close the hole entirely when you have made all the stitches you need to start your project. So cool!
This technique is great for giving your crocheted projects a neat and professional look.
How to do the magic ring
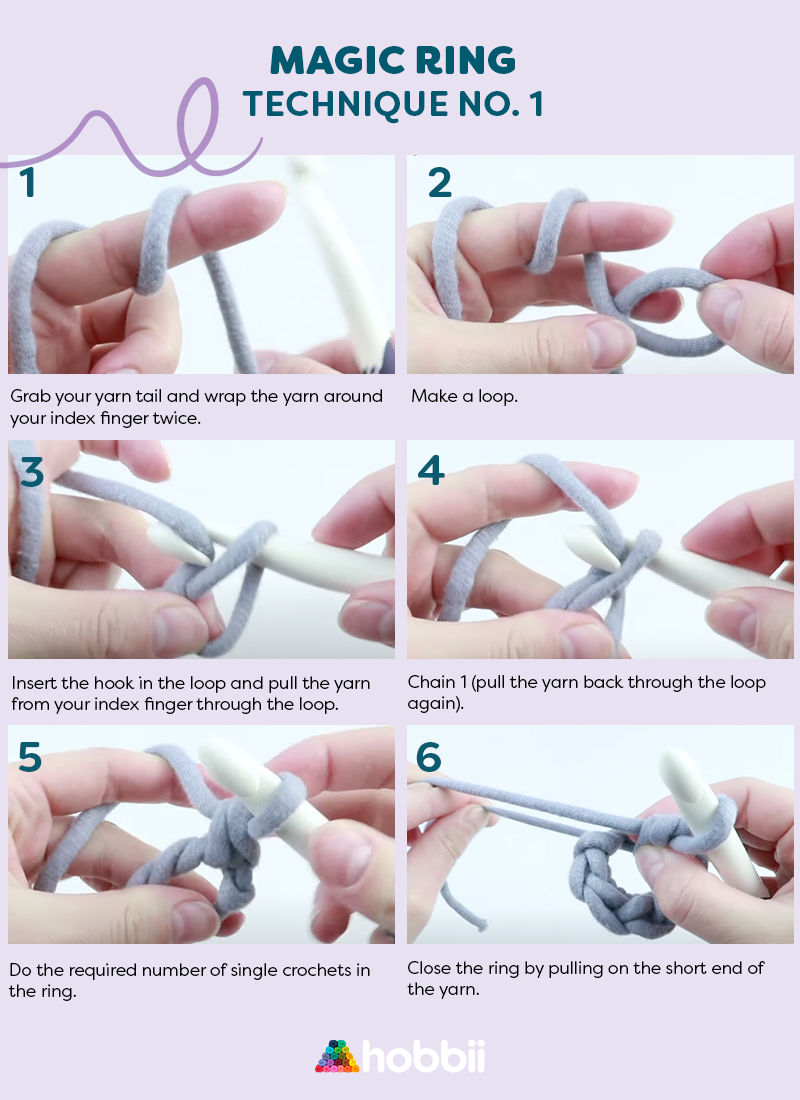
Technique no. 1
How to
- Grab your yarn tail and wrap the yarn around your index finger twice.
- Make a loop.
- Insert the hook in the loop and pull the yarn from your index finger through the loop.
- Chain 1 (pull the yarn back through the loop again).
- Do the required number of single crochets in the ring.
- Close the ring by pulling on the short end of the yarn.
You are now ready for the next step in your crochet pattern. Happy crocheting :)
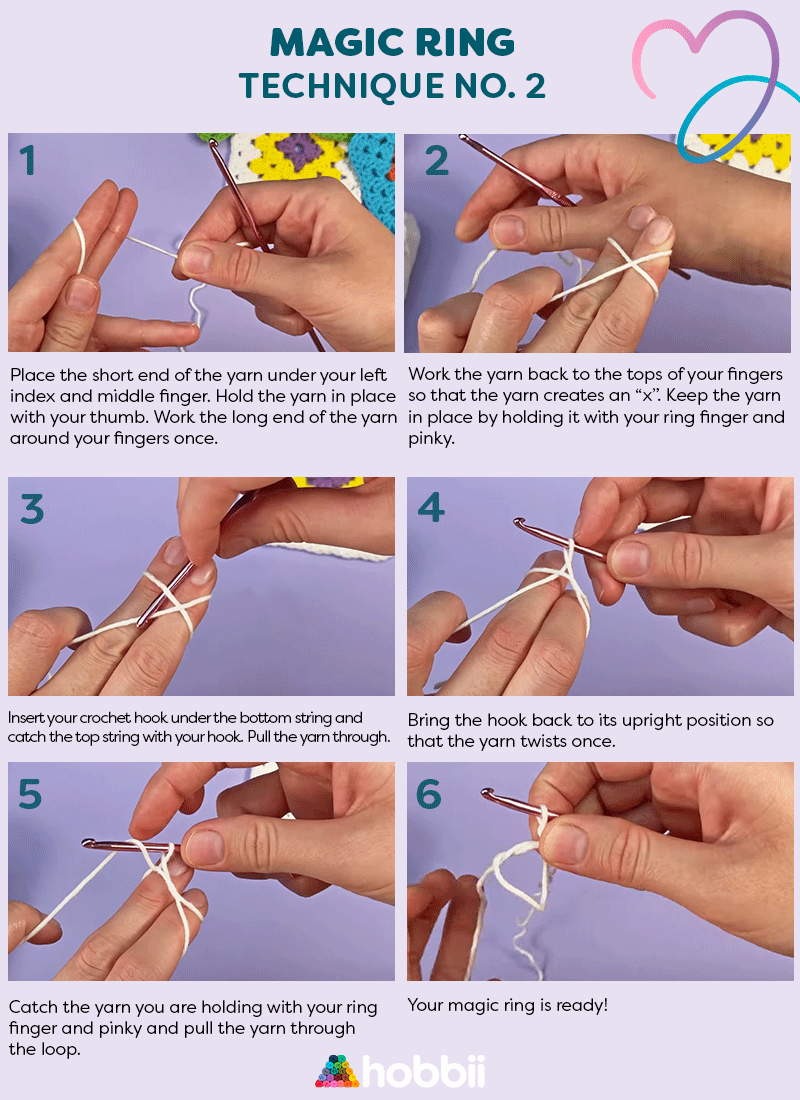
Technique no. 2
How to
- Place the short end of the yarn under your left index and middle finger. Hold the yarn in place with your thumb. Work the long end of the yarn around your fingers once.
- Work the yarn back to the tops of your fingers so that the yarn creates an “x”. Keep the yarn in place by holding it with your ring finger and pinky.
- Insert your crochet hook under the bottom string and catch the top string with your hook. Pull the yarn through.
- Bring the hook back to its upright position so that the yarn twists once.
- Catch the yarn you are holding with your ring finger and pinky and pull the yarn through the loop.
- Your magic ring is ready!
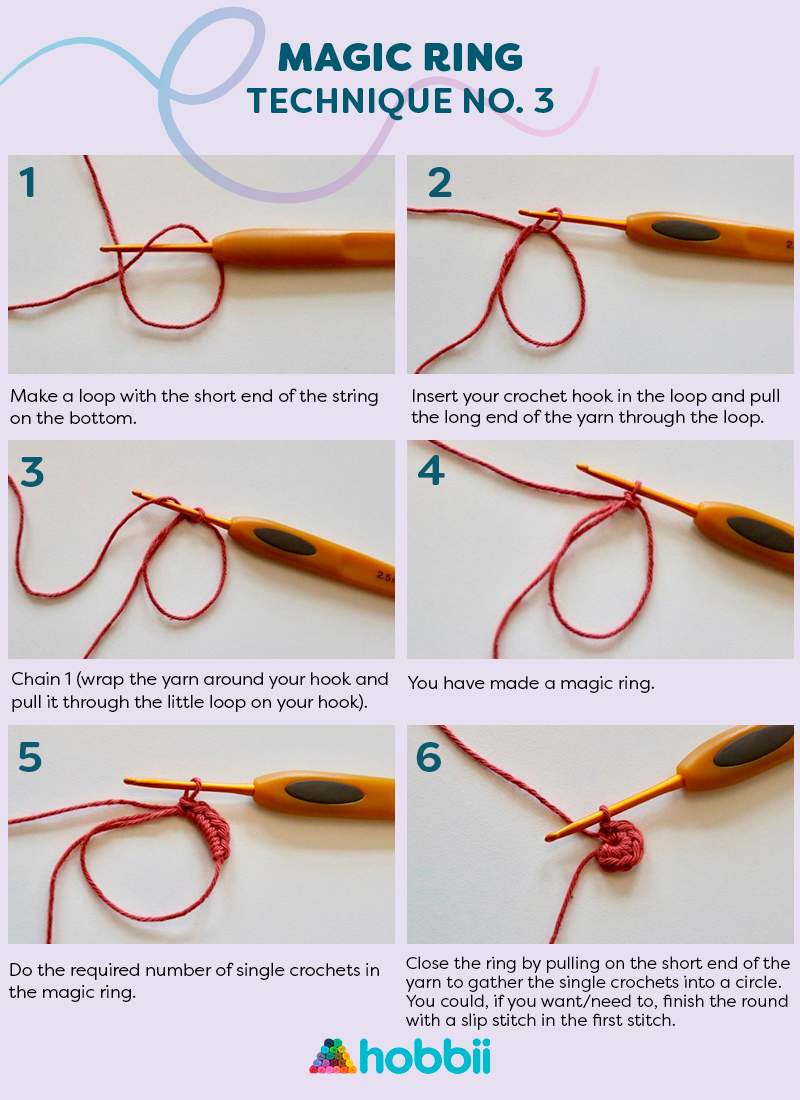
Technique no. 3
You can also place the yarn on the table instead of wrapping it around your index finger.
- Make a loop with the short end of the string on the bottom.
- Insert your crochet hook in the loop and pull the long end of the yarn through the loop.
- Chain 1 (wrap the yarn around your hook and pull it through the little loop on your hook).
- You have made a magic ring.
- Do the required number of single crochets in the magic ring.
- Close the ring by pulling on the short end of the yarn to gather the single crochets into a circle. You could, if you want/need to, finish the round with a slip stitch in the first stitch.
Still struggling with the magic ring? Did you know that there is another easy version of the magic ring that you can use for baskets and bags? Learn the easy technique here.

Leave a comment