Do you have a sports fan in your life? Maybe a child that loves Disney movies? Or a grandmother who loves tulips? You can bring all this to life with the C2C technique - because with this technique you can design logos, images, text, and so much more that’ll spread joy to those you love ✨
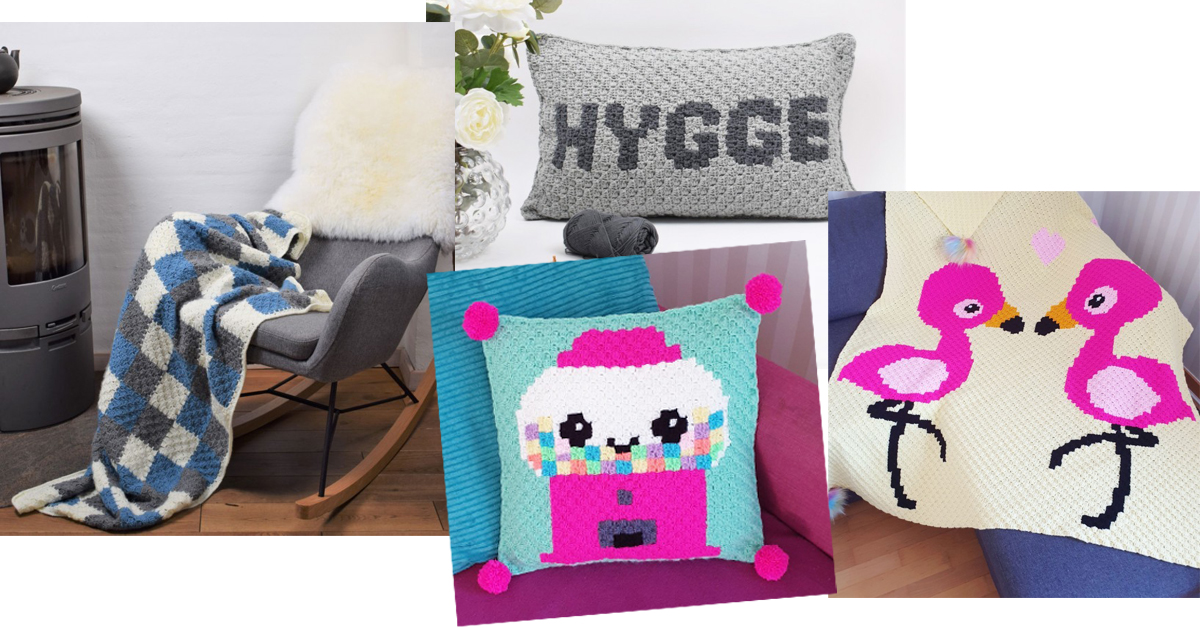
There’s almost no limit to what you can design with the C2C technique 👆
And all you need is yarn, a crochet hook, and, yes - your creativity. Well, there are some steps you need to take before you can swing your crochet hook around:
- Understand the technique
- Design your project
- Calculate the amount of yarn you need
This guide will take you through each step ❤
Understand the technique. What is C2C?
C2C means "corner to corner" because it’s a technique where you crochet small squares diagonally from corner to corner. As you work, you change out the colors to create patterns, letters, and images.
The result is a large square with lots of little squares. Kind of like the squared notebooks you used in math when you were in school, or the pixels on your TV screen. These squares are just made from yarn instead and will, in the end, become a blanket, pillowcase, placemat, almost anything, really.
Here you’ll find a video tutorial that explains the C2C stitch.
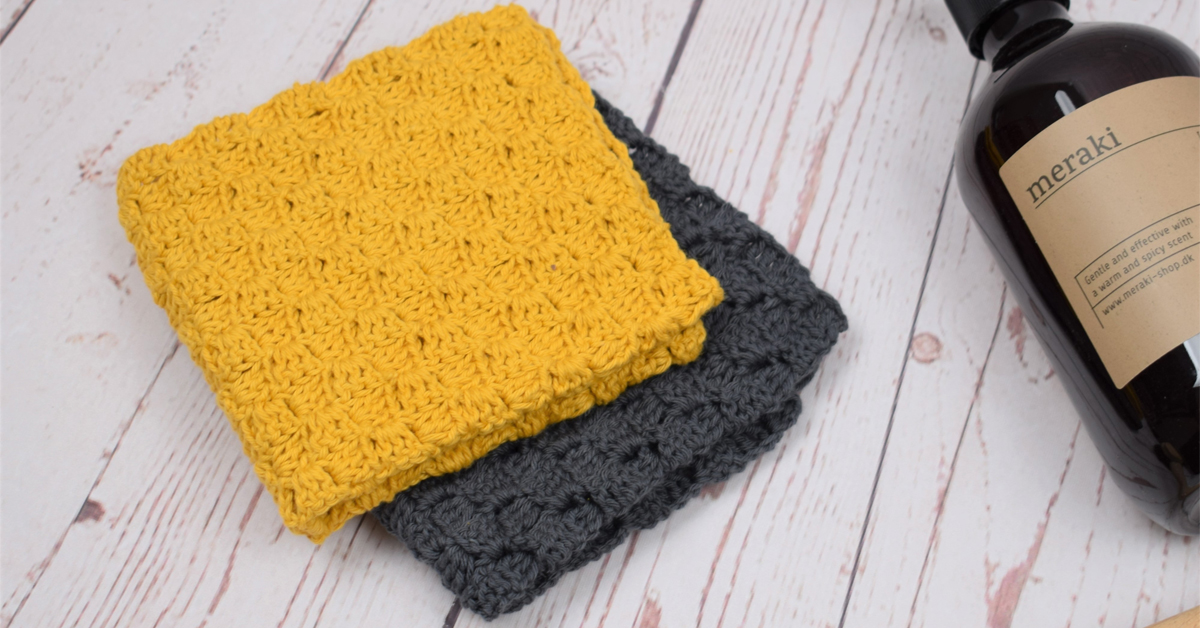
If you prefer written instructions, we have some nice patterns with text and photo illustrations that’ll help you along. Like the dishcloth below made with C2C.
You can find the pattern here, completely free of charge. 👉 here 👈
Before you start designing your own creations, you need to know how to change colors since it’s the combination of different colored squares that creates the pictures and patterns.
If you’re already skilled in the technique, you can skip the guide. If you’re new to the technique, then I recommend that you practice C2C and color changes in C2C.
You can find written instructions on how to change color below 👇
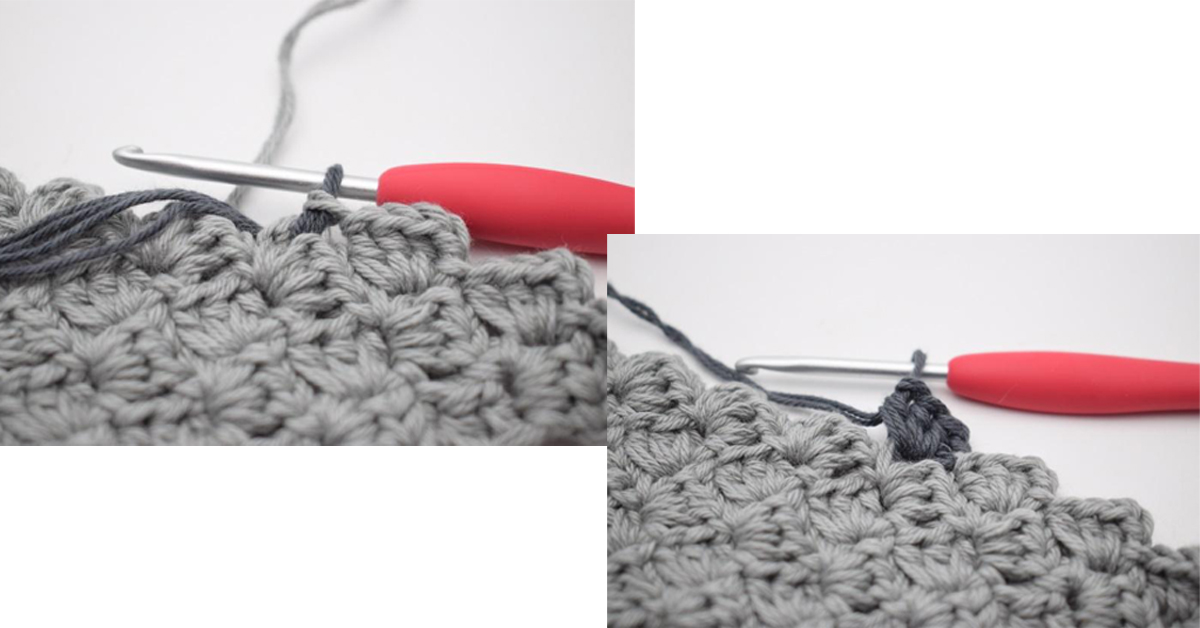
The color changes are done by making the first chain in the new square with the new color. Instead of making the new chain as you normally would, you insert your hook into the square and pick up the new color. Then you make your chains and can now continue crocheting with the new color.
The color you’ve dropped is now “locked” and waiting for you until you’ve finished your row, turn your work, and start your new row. From there, you’ll return to your old color and will be able to pick it up if you need the color again. That way, you’ll avoid weaving in lots of ends. But keep in mind that you’ll be working with several different skeins of yarn at the same time.
When you have the techniques down, you’re ready to design your own creation 🤩
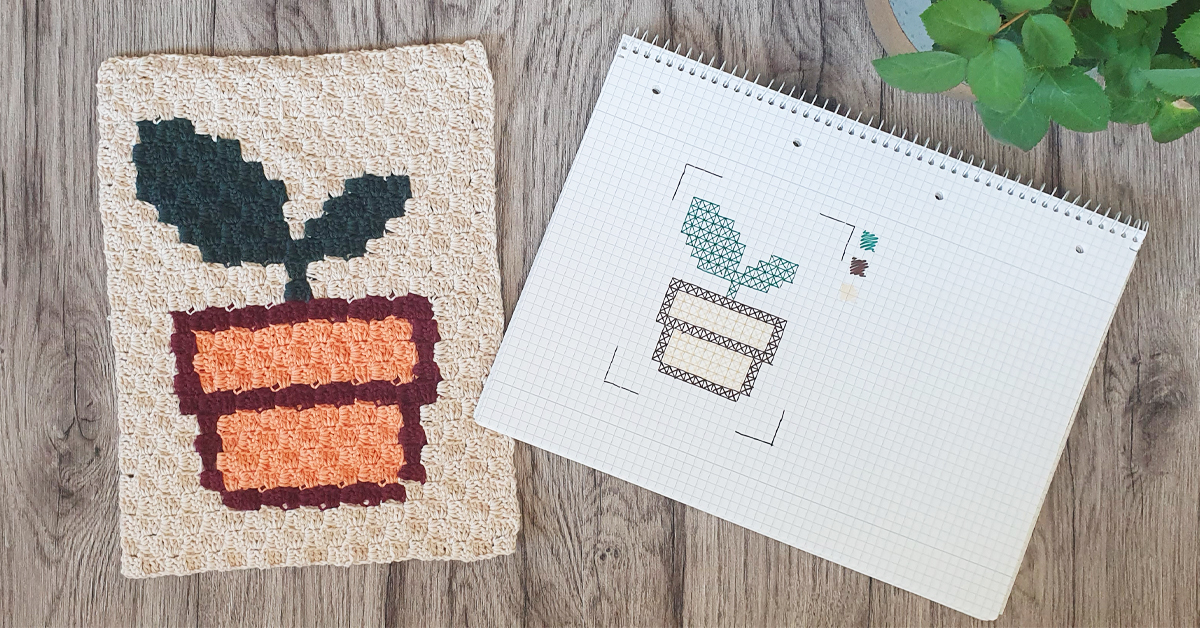
Design your project
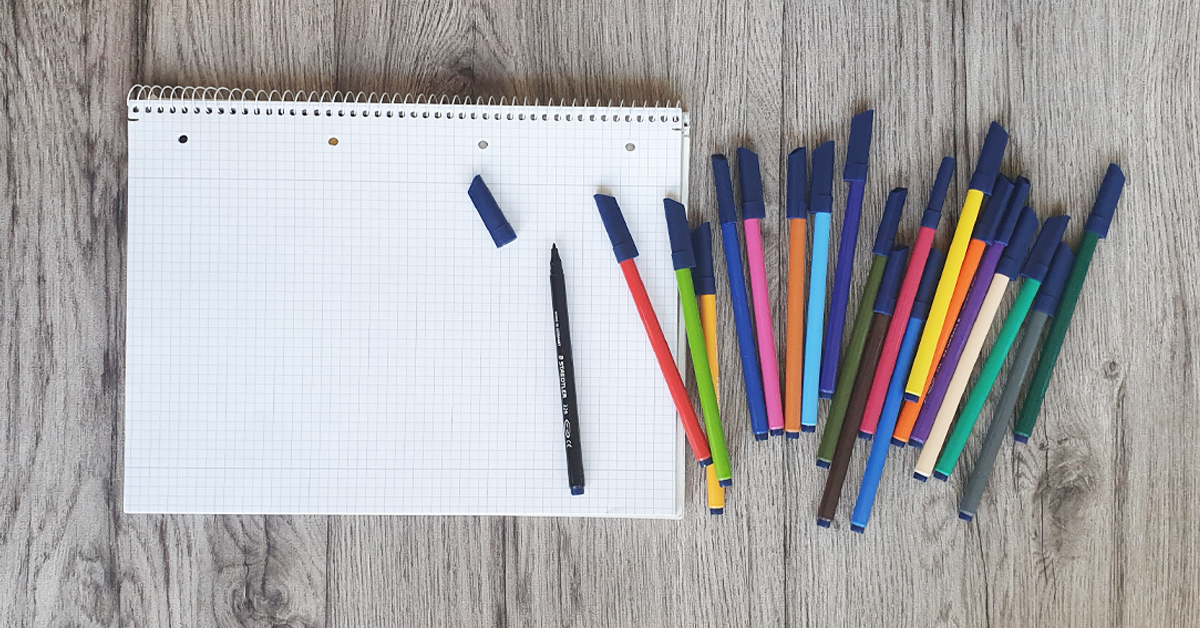
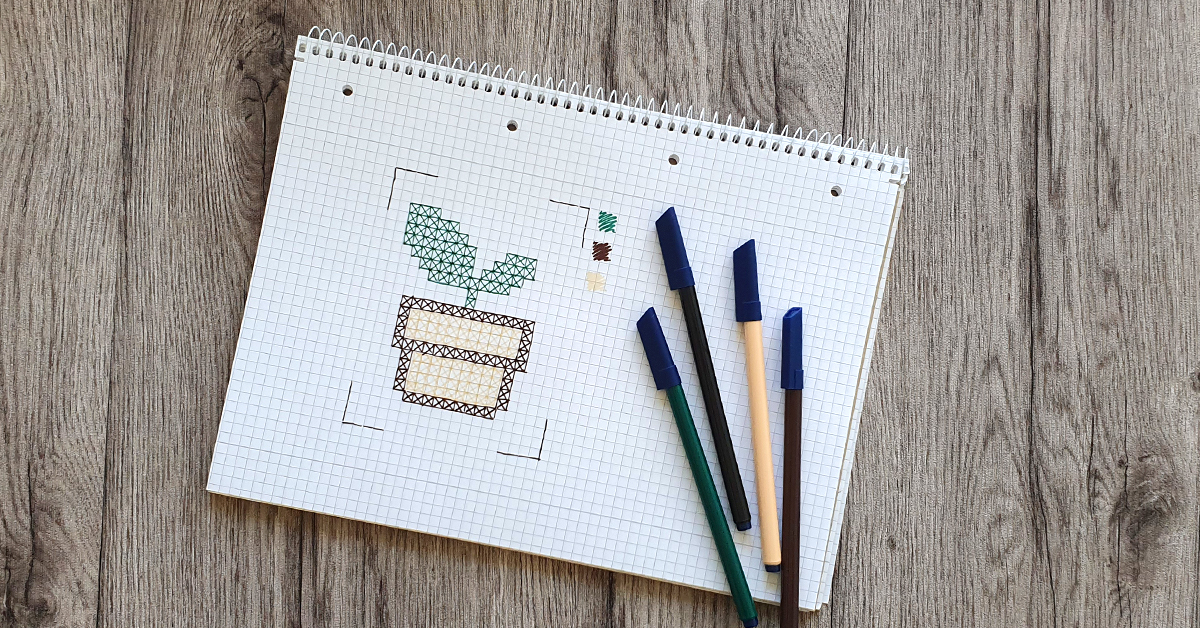
Now you’ll get the chance to let your creative juices flow. Now you need to design your own motif! For this, you’ll need a piece of squared/graph paper and something to draw with. Using these tools, you’ll be creating your diagram that you’ll be following while you crochet.
TIP: If you’re not a fan of pen and paper, you can use digital programs like Microsoft Paint instead. You can also download different pixel drawing programs on most smartphones.
Before you start drawing, you need to make som important decisions about your design:
How large should it be?
The size dictates the framework for your design. You want to make sure that your pillowcase won’t be too big or your blanket too small to cover both feet and shoulders simultaneously.
I recommend that you make a crochet swatch to help you determine the size of each square.
You can make the crochet swatch like so:
Get a skein of the yarn you’d like to use for your project - alternatively a skein of yarn of the same thickness.
Make a swatch with the yarn that’s 5 squares long and 5 squares wide (25 squares in total). When the swatch is done, you measure how long and wide the swatch is and divide it by 5:
- Length of the swatch ÷ number of squares (5) = length of 1 square
- Width of the swatch ÷ number of square (5) = width of 1 square
The squares should be the same length and width, but it’s a good idea to check both measurements to be completely sure. If the length is slightly larger than the width, or vice-versa, you can just find the average of the 2.
Now you need to decide how large your project should be. With these numbers, you can calculate how many squares your project should be long and wide.
The math looks like this:
- Size of the project ÷ size of the square = number of squares
If you’re designing, e.g., a blanket that needs to be 200 cm long (approx. 6 ft 7”) and 100 cm wide (approx. 3 ft 3”), the math would look like this:
- Length = 200 ÷ size of square
- Width = 100 ÷ size of square
This is the number of squares you’ll need for your design. Now you just need to find your paper - or digital program - and make sure that it has the same number of squares as your finished project would need. This is your canvas that you can draw your masterpiece on.
What - and how many - colors would you like to use?
It’s important to be realistic and limit yourself. If you choose a complex design with 20 different colors, it’s going to be extremely time-consuming, since you’ll have to switch between many colors.
Now you’re ready to design your motif:
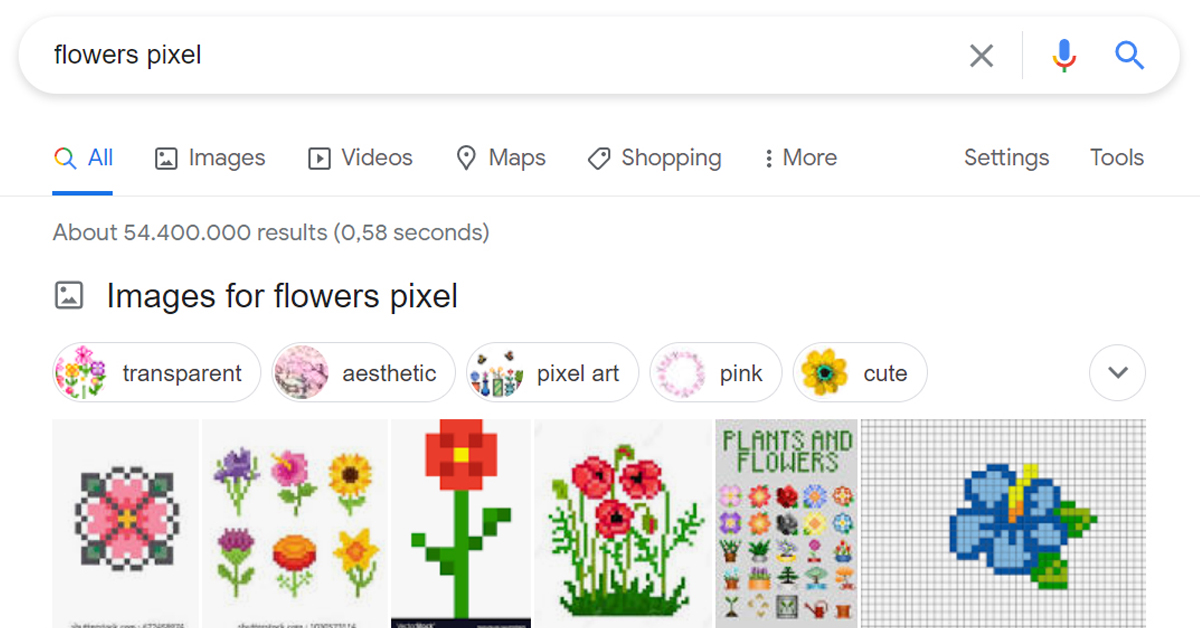
With your chosen colors and your canvas, you’re ready to get started! If you need a little inspiration, you can try a quick image search on the internet. Just search for the motif, pattern, logo, etc., you need - combined with the word “pixel” or “cross-stitch”.
If you, e.g., would like to make a flower motif, you would write “flowers” and “pixel”, or “flowers” and “cross-stitch” to get images like these:
The same goes for letters. You’ll find those by writing, e.g., “alphabet” and “pixel”, or “alphabet” and “cross-stitch”.
Now you just need to draw your design! Make sure to keep editing until you’re satisfied. It is incredibly difficult to change your design once you've started crocheting as it may force you to chenge some parts you've already crocheted.
Calculate the amount of yarn you need
When you’re satisfied with your design, you need to get the yarn. It’s important that you get enough yarn in each of the colors you’ve chosen so that you don’t run out in the middle of your project. One of the ways to calculate this is by figuring out how much yarn you use for one square - and then determine the amount you need from these numbers.
You can use the same crochet swatch as you made before. Undo/frog the whole crochet swatch and measure the amount of yarn you used in the swatch. Divide the length by 25 (number of squares in your swatch) to get the average amount of yarn used for each square.
Meaning:
- Total amount of yarn used (cm) ÷ total number of squares = yarn used per square (cm).
It’s important that you take the time and actually make the 25 squares and not just settle for a smaller swatch. By making a large sample, you take things like small changes in knitting tension and the extra yarn you need for the chains at the end of each row into account. If you only make a couple of squares - that, perhaps, turned out a little tight - you’ll use less yarn than you probably would under normal circumstances. If you use this number to calculate the amount of yarn you need, you’ll get a smaller number per square and may end up not buying enough yarn for your project.
REMEMBER: You need to consider the extra yarn you use when changing colors. Unfortunately, this is impossible to calculate since it’s determined by how many color changes you do. More color changes = more ends to weave in. It also depends on whether you choose to break the yarn and weave in the ends or whether you choose to “carry” the yarn through.
For a pillow or shirt, 20 grams extra (0.7 oz) of each color should suffice. But if you’re making something like a large blanket with many color changes, then you may need as much as 100 grams (3.5 oz) extra of each color. It’s better to have a little yarn left over than to run out in the middle of the project!
TIP: Should you end up with some leftover yarn, then you can find some inspiration on what to use those leftovers for here 👉 The scrap yarn sweater and other cool scrap projects
Now that you know how much yarn you use for one square, you need to figure out how many squares you need to make in each color. Count the number of squares you have in your design in each color.
For each color, you need to count how many squares you need to make and then multiply this number with the amount of yarn you need per square - i.e. the calculation you just did.
Calculating the amount of yarn for each color:
- Number of squares x amount of yarn per square (cm) = total amount of yarn in the given color (cm).
Example: If you need 200 red squares, and you’ve calculated that the amount of yarn used per square is 30 cm, then the math looks like this:
- 200 squares x 30 cm of yarn per square = 6000 cm (or 60 meters) of red yarn.
Want to make sure that you’ve counted right? It’s easily done by deducting them from the total amount of squares you need in your project.
Example: You’re making a pillow that’s 50 squares wide and 50 squares long:
- 50 x 50 = 2500 squares total.
When you’ve counted all your squares, add them up and see if you get the same number as the total amount you need for the whole pillow. If you don’t get the same number, you’ve miscounted. If you’re only a couple of squares off, you should be fine.
When you’ve calculated the amount you need in each color, you just need to buy the correct number of skeins 🧶
Crochet time!
Now your project will truly come to life ✨ We’ll give you a couple of tips to make the process easier for you:
Your sketch is your “manual” for the entire project. To keep track of your progress, you can cross off the squares as you go. It’s a good idea to make a copy of your manual so that you don’t destroy the original.
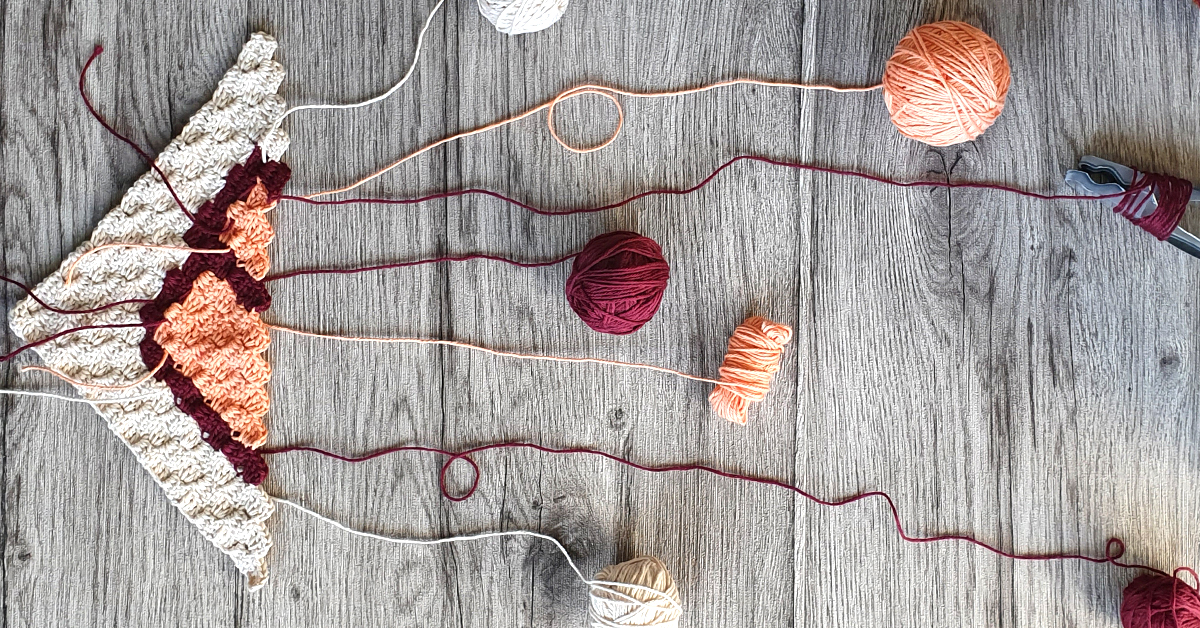
Organize your skeins! If you’re using several colors, you’ll probably have several skeins in play at the same time. One way to organize your skeins and keep them from tangling is to make smaller skeins and attach them to your project with a clothespin. Alternatively, you can get away with just letting them sit beside you, but it’s important that you stop each time you’ve finished a row and spend a little time organizing them again. Otherwise, you run the risk of knots! 😬 This is where yarn holders become really practical since they keep the skeins stationary and keep them from rolling around and getting tangled with each other.
Consider whether you want to carry the colors through the project or break the yarn and weave in the ends. I usually use a mix of the two techniques in my C2C projects. Carrying the yarn usually works best if you don’t need to carry it too far. On the other hand, if I finish a certain color - and won’t need that color anymore -, then I usually choose to break the yarn and weave in the end.
The same goes if the color you need to carry is very different from the other yarn you need to carry it with, e.g., a yellow and a blue because the color that needs to be carried will be hard to hide.
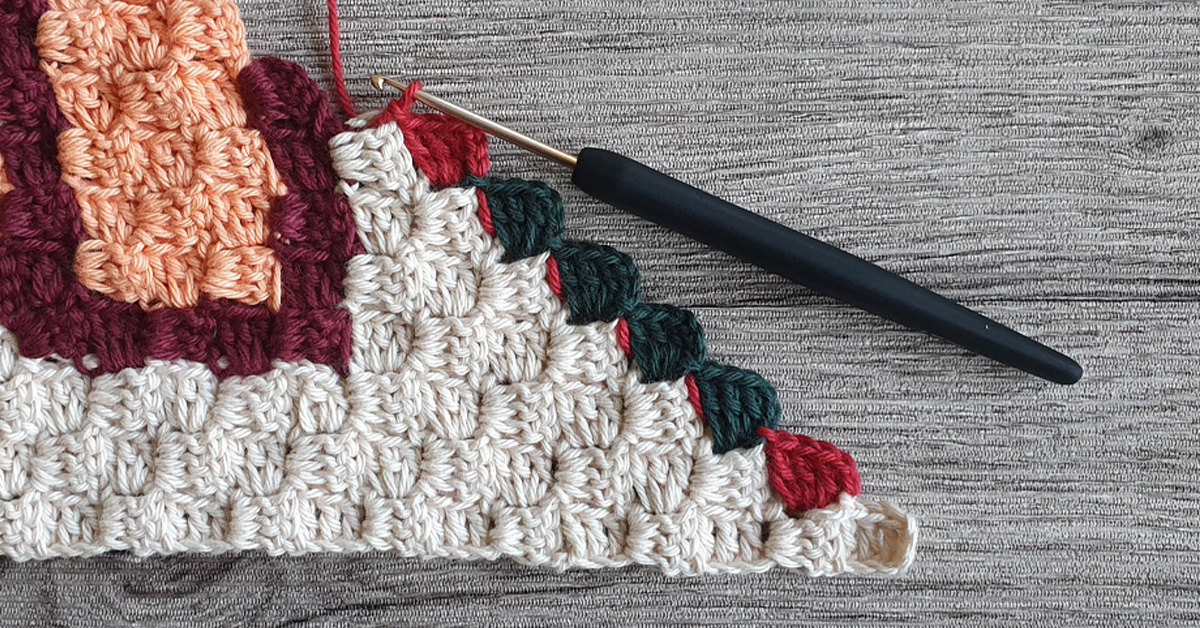
In the picture below, you can see how the color is carried. You just place the strand next to the stitches from the previous row. When you work on the next row, you work over the strand, and the color is, thus, carried through the project. The strand in the example below is red and, thus, very visible.
Do not start your own project before you’re comfortable with the basic C2C techniques and have practiced them thoroughly. You could use a pattern like this one to practice your color changes 👉 Kawaii Rainbow Pillow.
Start small: a blanket can easily take several months to make, while a pillow, placemat, or other smaller projects are easier to start your C2C adventure with 😊
Check your work as your go. It’s easy to get caught up and make row after row without checking your work. But it can cost you an insane amount of time to undo row after row to fix a mistake. I usually stop after I finish each row and check my work thoroughly before I turn it and start the next row.
Weave in ends as you go. It’s almost impossible to avoid ends that need weaving in, and if you work with several colors, you’ll probably have quite a few of them. If you’re working on a large project with lots of loose ends, it can feel like an overwhelming task to weave in all those ends and really finish your project.
Last but certainly not least:
Be patient! When I make a mistake, it’s usually because I’m impatient. Because that’s what the C2C technique is really all about. But if you’re generally a patient person, everything will be fine - if you make a mistake, you just need to undo a little work and fix it.
Have any great ideas for designs? Please show us in the comments below 👇


Leave a comment