When you crochet, your tension has a huge influence on the finished result. If the tension isn’t even, you may end up with different size socks, sleeves that aren’t the same length, uneven rows, and many other crochet catastrophes.
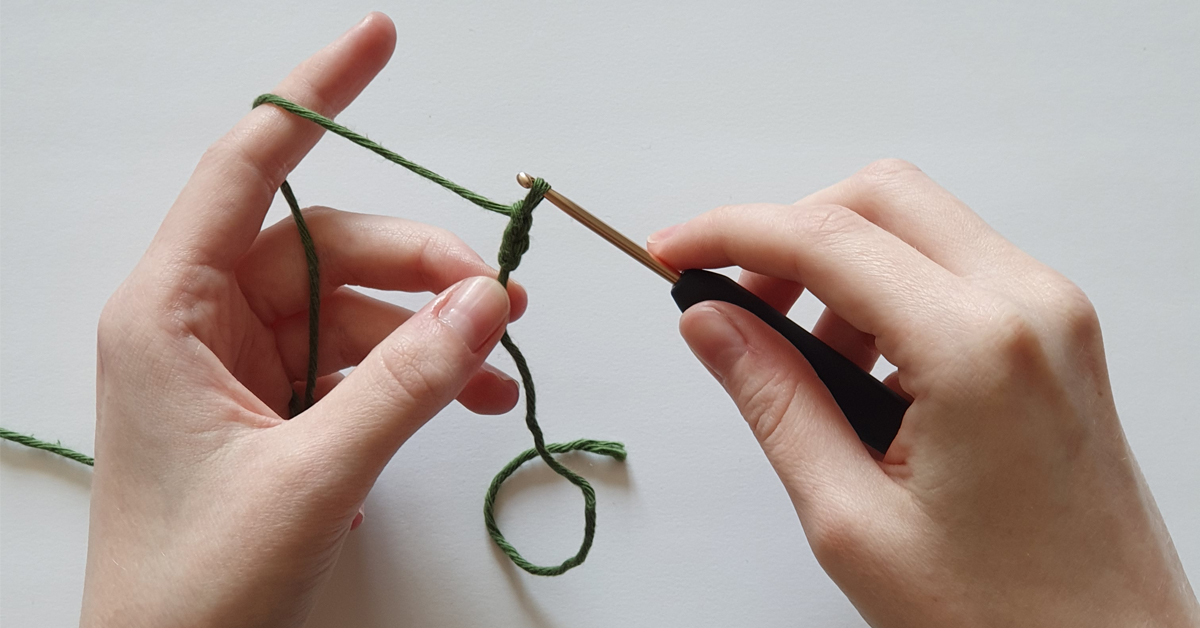
Am I being a little over-dramatic? Perhaps, but it can be extremely frustrating when you’ve spent endless hours working on a project that you’re not satisfied with.
That’s why I want to give you some tips and tricks to help you optimize your tension and ensure even and beautiful results again and again.
What Is Crochet Tension?
Crochet tension describes how loose or tight your crocheting is and, thus, how many stitches and rows you make per centimeter in a finished project. If you’re holding the yarn too tightly, the tension will be higher, and your rows will be very tight. The stitches will get smaller and the rows shorter. On the other hand, if you’re holding the yarn more loosely, the tension will be lower. The stitches will then get bigger and the rows longer.
If you have a very even tension - meaning, you either crochet tight or loosely throughout the entire project - it shouldn’t be a problem. To get a looser tension, you can work with a larger size hook. Similarly, you can size down to get a tighter crochet tension.
The problem only arises if your tension isn’t even. This is where tragedies happen.
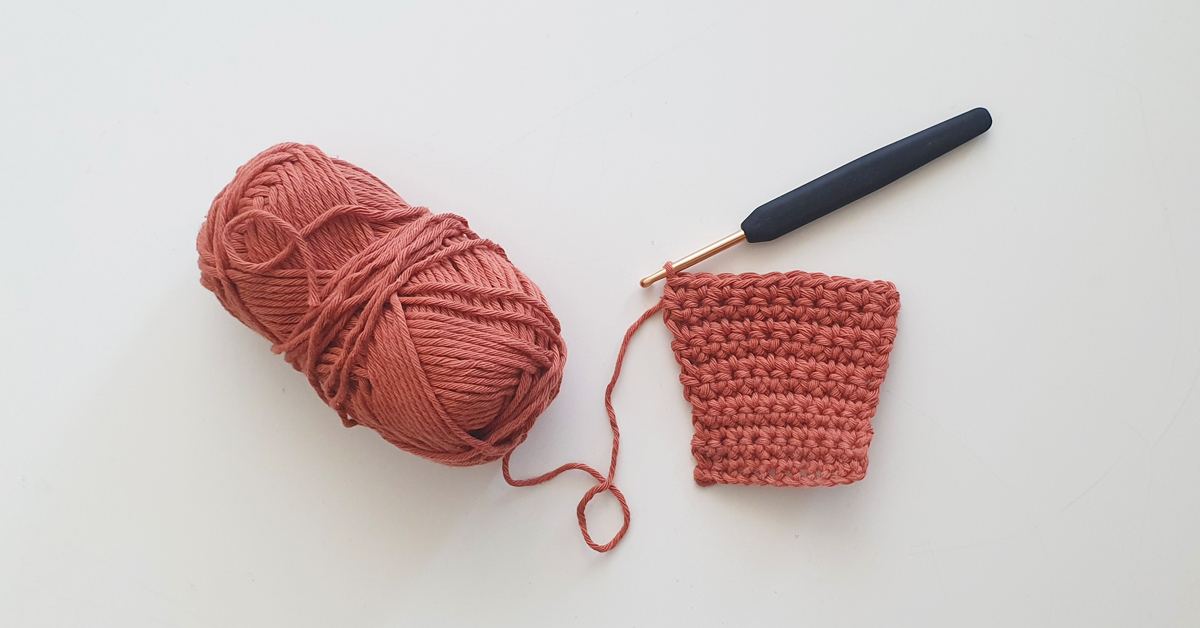
Below is an example of an uneven crochet tension 👇 The square has the same number of single crochets in each row. The only difference is the tension. The bottom is crocheted tightly, while the top is crocheted pretty loosely. It’s important to note that unevenness will only increase exponentially with the size of your project. If you’re making, say, a set of sleeves with 60 rows, it can make a huge difference if the tension is tighter in different rows.
Remember the crochet gauge swatch
Swatch, swatch, swatch! You can’t deny that it’s usually a good idea to make a crochet gauge swatch before you start your project. That way, you can check whether your tension matches the one in the pattern - and if you should switch to a bigger or smaller hook size to avoid the headache of a project becoming too large or too small.Do yourself a favor and make a gauge swatch first - it’s time well spent.
How Do I Ensure an Even Tension?
There are several tricks that can help you master your tension. I’ll start with the boring one...
Practice, practice, practice
Yeah, yeah. I know! It’s kind of obvious and doesn’t sound very exciting. But I don’t mean that you have to crochet 100 test sweaters before making the final sweater.
Often, you just need to practice the techniques by making simple squares or swatches until you’re used to them. As you make the squares, you’ll, hopefully, notice that it gets easier and that the work just flows naturally through your fingers. When it does, your tension will usually become more even.
TIP: If you’re crocheting something in cotton, you could crochet squares of approximately 6”-12” (15-30 cm). These work great as dishcloths. And you don’t feel like it’s a waste of time and yarn to make them, and it doesn’t really matter if they’re not completely even. If you’re using other materials or expensive yarns, you could try making a single square, undo it, and make the square again with the same yarn. That way, you use the same yarn over and over again, and the rest of the yarn will remain fresh for your project.
Find the best placement for your yarn
As you work on your techniques, your hand will naturally become better at adjusting the tension. But, even as an experienced crocheter, I sometimes find that my tension gets slightly uneven if I don’t have proper control of my skein.
Example: The yarn may create natural tension if it’s new and you’re pulling the yarn from the middle. As you work your way through the yarn and enough yarn has been taken from the middle of the skein, the skein becomes looser and loses its tension.
Instead, make sure to pull a couple of yards out from the skein and let it hang loose while you work with it.
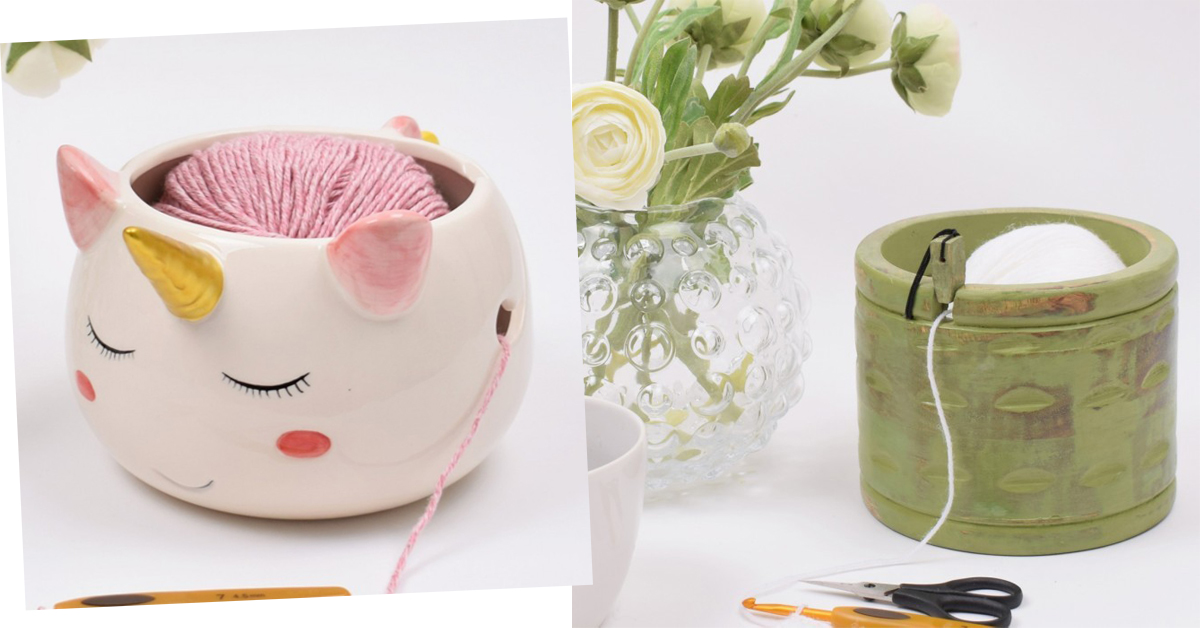
Consider placing your skein in a yarn bowl and pull the yarn from the outside of the skein. That way, the skein stays in place and the yarn has a more even tension.
Grip the yarn properly
In my opinion, there’s no right or wrong way to hold the yarn. The most important thing is that you:
- Have a proper hold of your yarn. If you feel insecure or often drop your yarn, you may end up tightening your grip and, as a result, increase the tension as you work on your project.
- Can keep holding the yarn without getting sore. If your hand gets sore fast, you need to stop working and take breaks frequently. If you work while your hand is tired, you may end up with a looser tension.
Below are some grips that I use and switch between, depending on the thickness of the yarn, crochet techniques, etc.:
Method no. 1 is the one I use the most. It works well if you need a looser tension since it gives you a good level of control without getting too tight. You control the tension by squeezing the yarn between your index and middle finger. The more you squeeze those two fingers together, the tighter the tension.
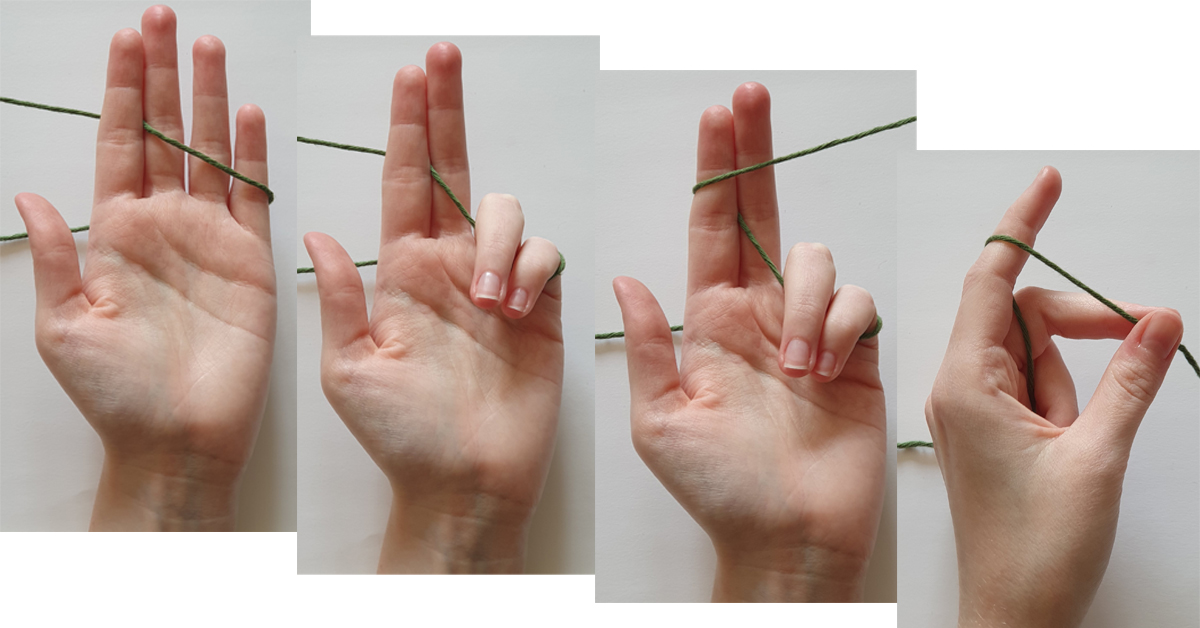
Method no. 2 is good if you’re a fan of method no. 1 but need a little more tension - e.g., when crocheting amigurumi. Here, you wrap the yarn around your wrist before you wrap it around your palm. You still use your index and middle finger to control the tension, but the extra wrap tightens the yarn for you slightly.
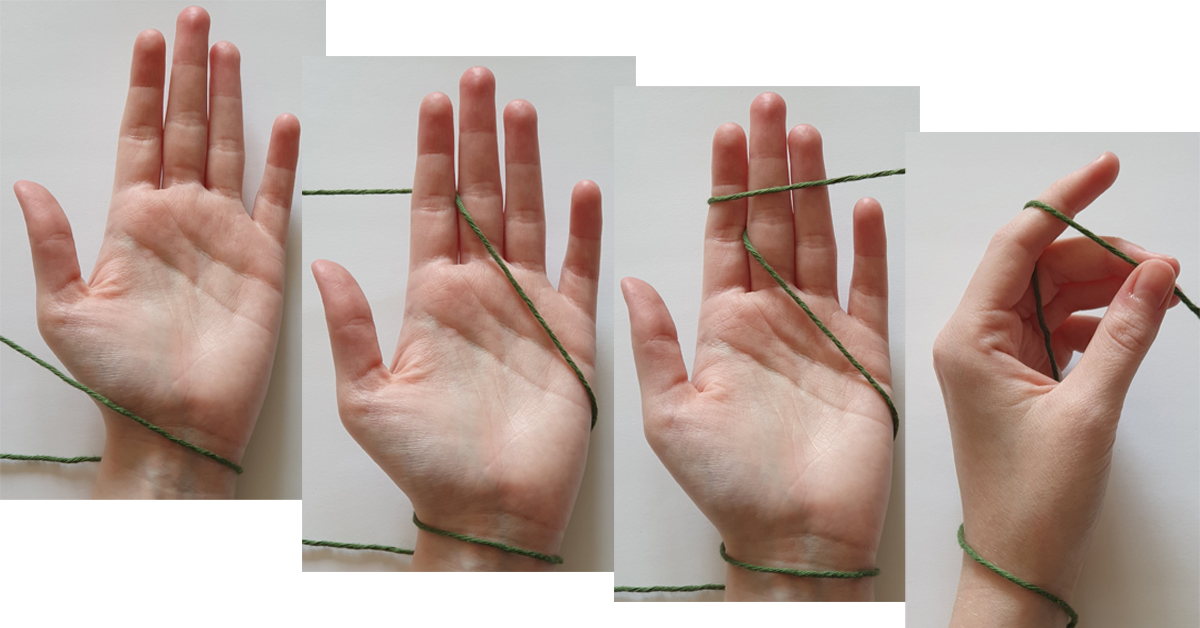
Method no. 3 is the one I usually use for thinner yarns like Rainbow Cotton 8/4. Here, you wrap the yarn around your pinky before you wrap it over your index finger. That way, you can squeeze the yarn between your index and middle finger as well as your pinky and ring finger, giving you complete control of the yarn.
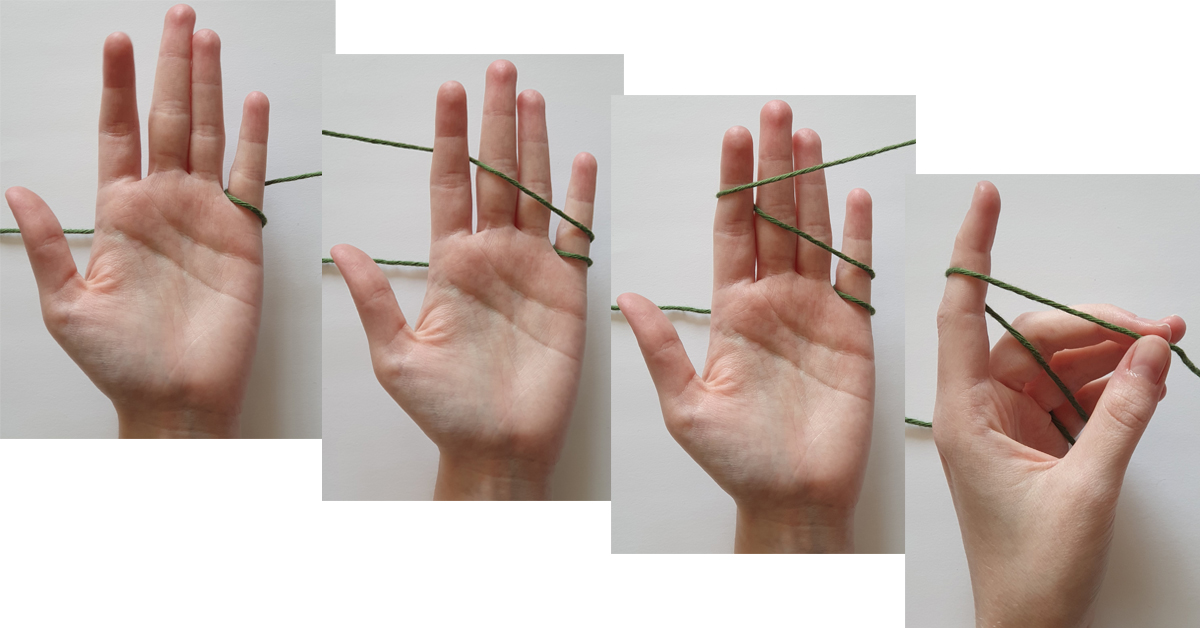
Try different gripping techniques. YouTube is a great tool for this because you can research various crochet techniques and see how the different crocheters grip their yarn.
Remember: If none of the grips feel right, don’t be afraid to play around with them and adapt them to fit your needs. I’ll say it one more time: It needs to feel right to you!
Crochet your own tension regulator
We show you how to in the video below.


