The Picot Stitch will add an elegant touch to any crocheted project. We will show you how to crochet a decorative picot edge right here.
Video tip! Click on “Settings” (the small gear under the video ⚙) to change the language of the subtexts. You can also adjust the speed of the video if you need to rewatch the technique at a slower pace.
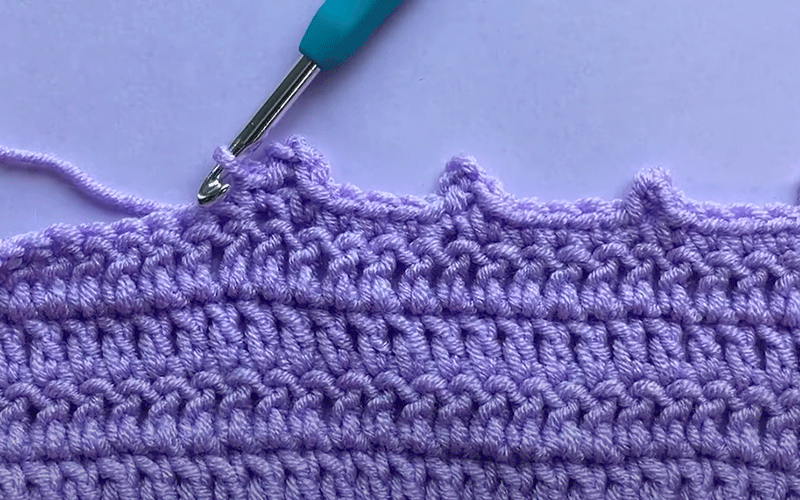
The Picot is a crochet stitch that will work as a nice finish on many crochet projects. The picot stitch is perfect for decorative edges on projects like shawls, scarves, and other clothes.
The picot stitch is abbreviated with a single ‘p’.
How to crochet a picot stitch edge
A picot consists of three chains, a slip stitch, and a single crochet.
- Start by chaining 3.
- Insert your hook into the back loop/bar of the first chain.
- Do a slip stitch.
- Now do a single crochet in the next stitch to anchor your picot.
You just did your very first picot! Isn’t it adorable?
You decide how many single crochets you want between your picots. Try a couple of different options and see which one you prefer.
Back loop - what’s that? Check out this blog post and learn how to identify the back loop.
This is what a Picot edge looks like
Are you left-handed?
In the video below, we will show you what it looks like to crochet a Picot with your left hand.
